AllUnite Equipment Installation Guide firmware version 51.1
Equipment
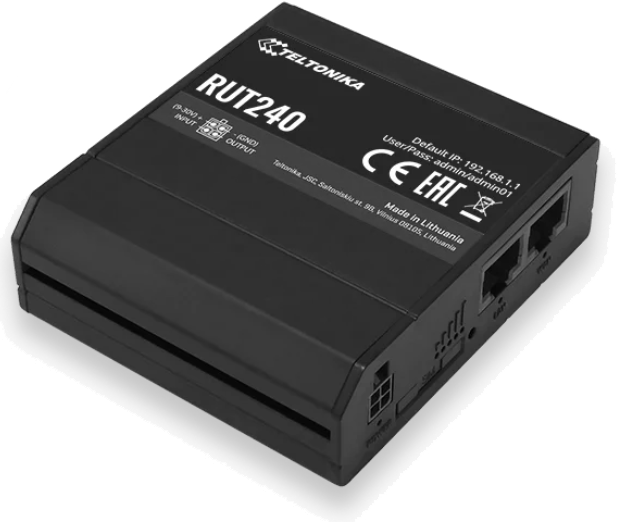
Teltonika RUT240 Router
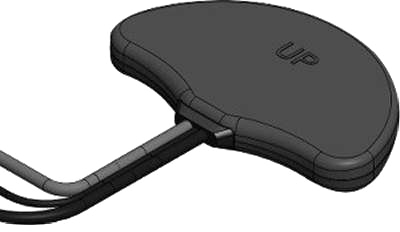
Panorama Antennas, Inc. GPSCO-7-27-24-58
Installation Process
Before the installation, please make sure that you have a laptop and a phone with a camera or photo camera to conclude the installation process.
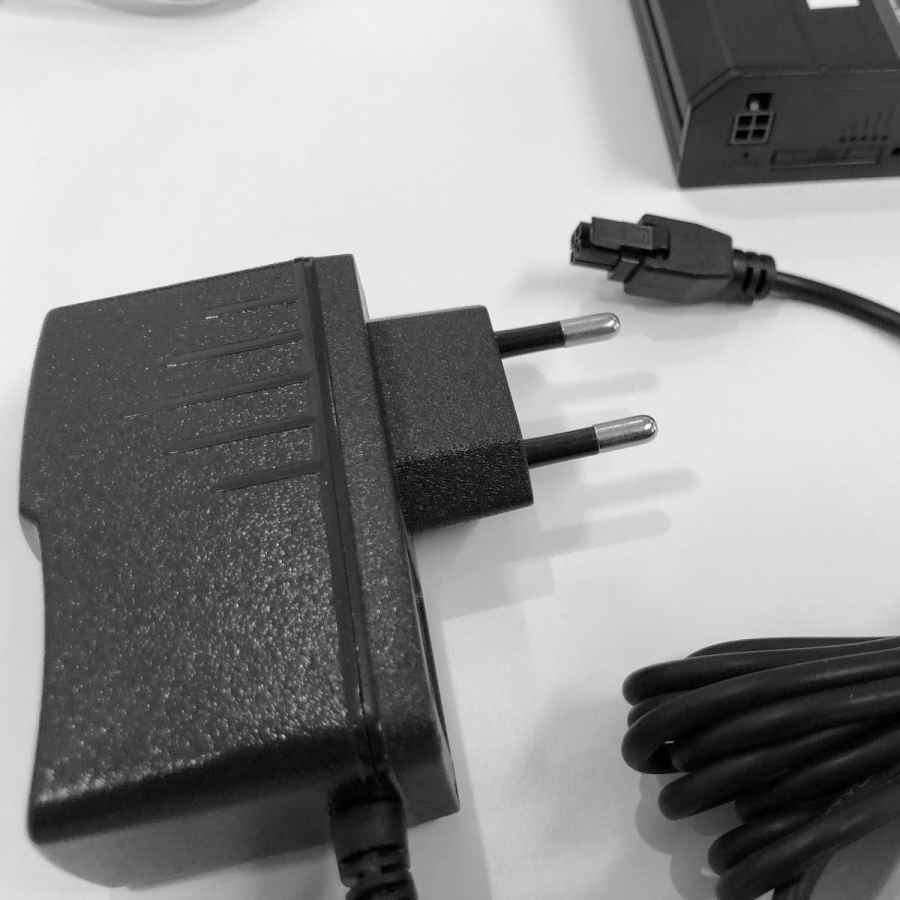
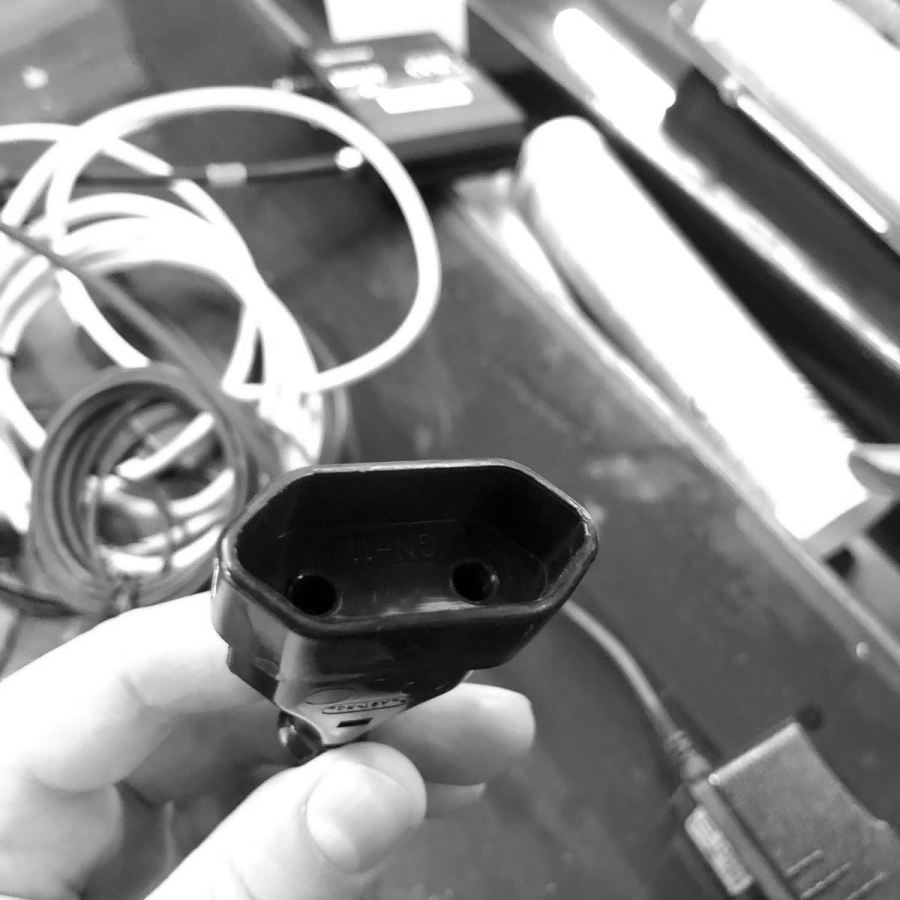
1. Check that the power supply for the router is present.
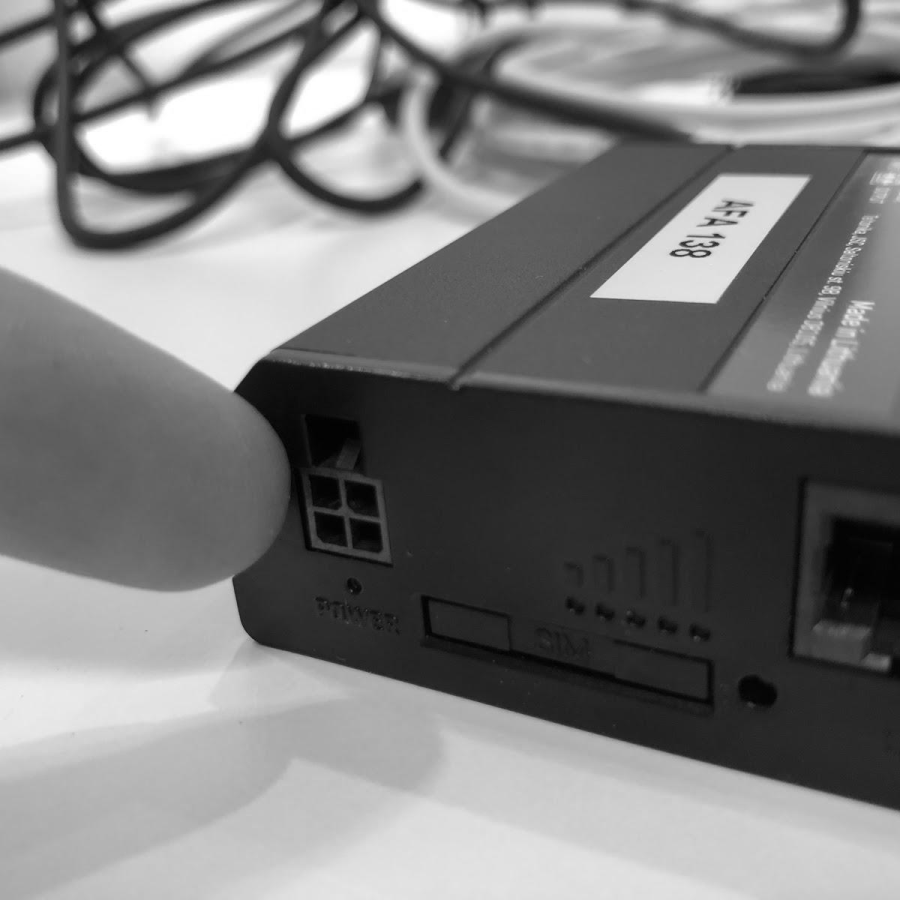
2. Connect the power cord to the specified socket.
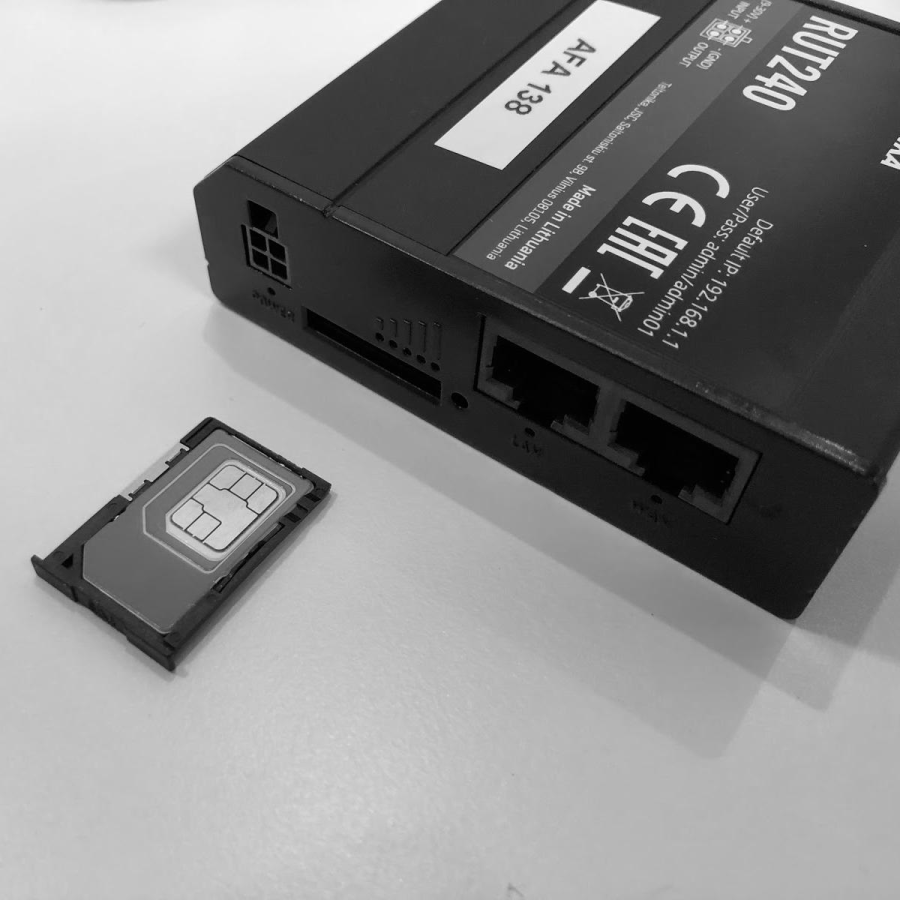
3. Use a pin to eject the SIM card tray. Place the SIM card in the tray as shown on the picture.
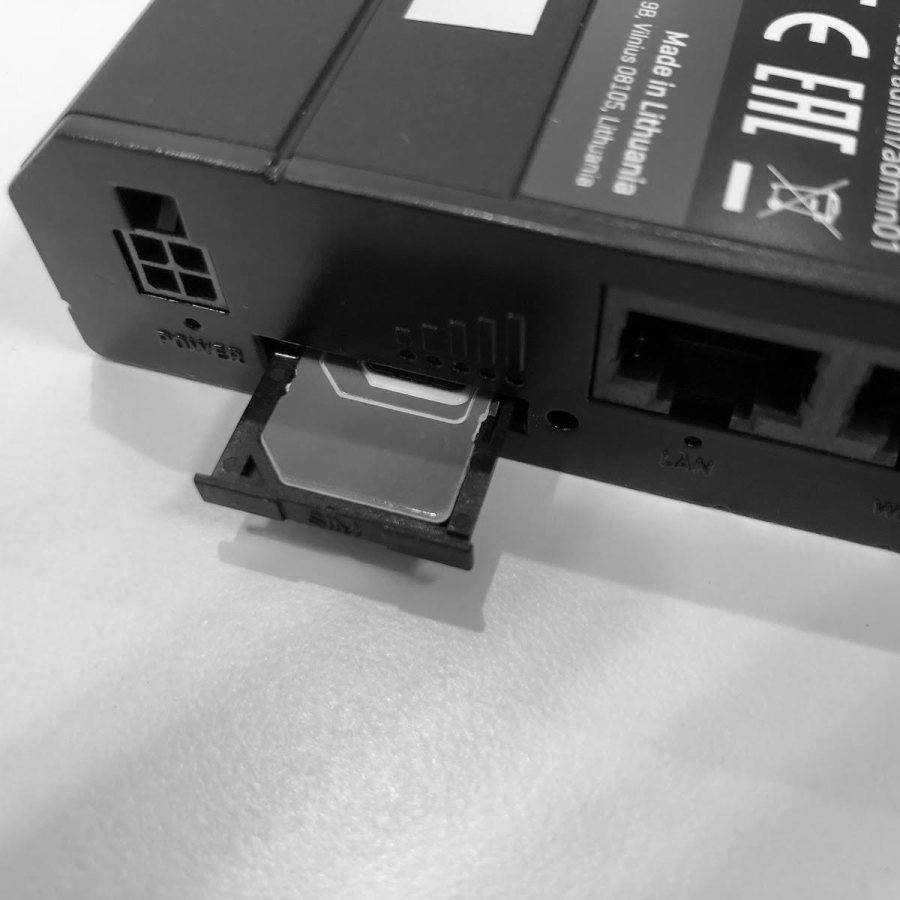
4. Insert the SIM card tray back until it clicks.
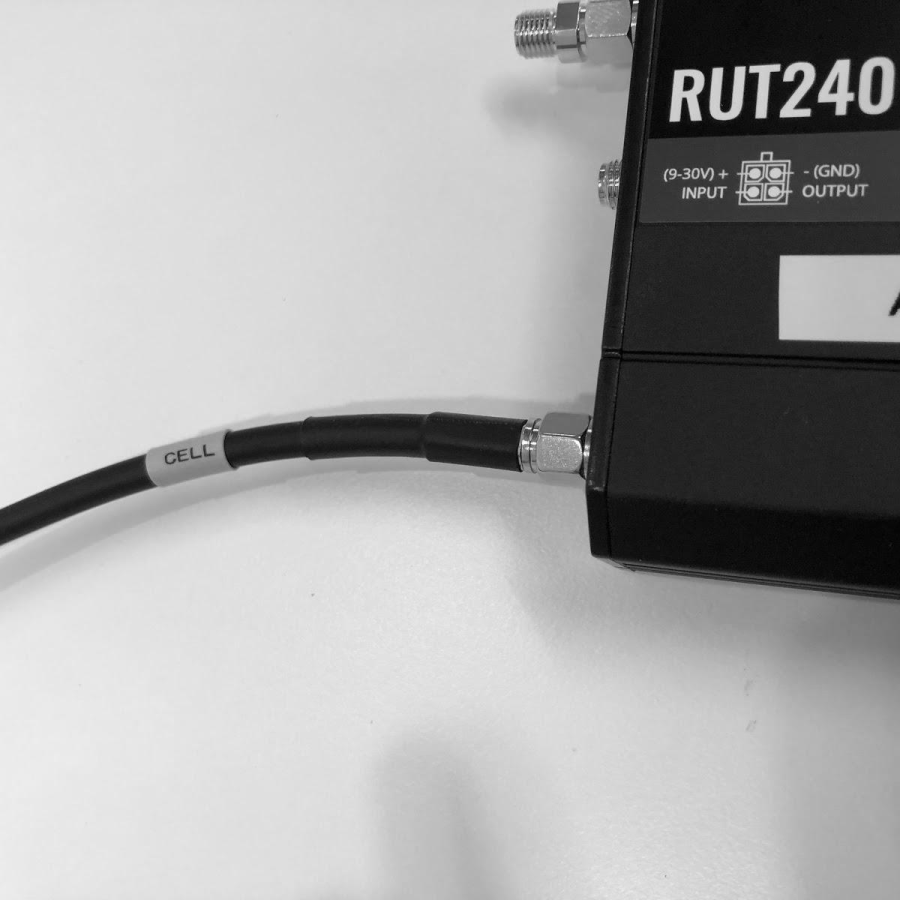
5. Connect antenna cable with the label “cell” to the “mobile” connector located at the edge of the device, as shown on the picture.
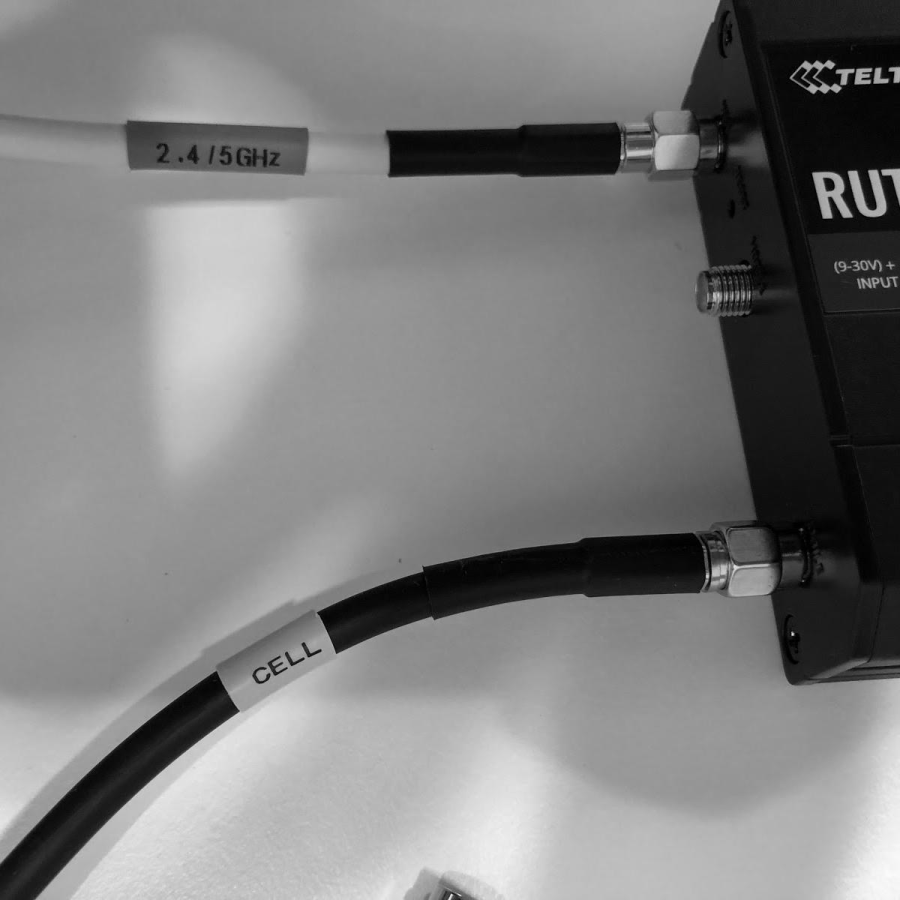
6. Connect the antenna cable with a label “2.4/5GHz” to the “Wi-Fi” connector of the router.
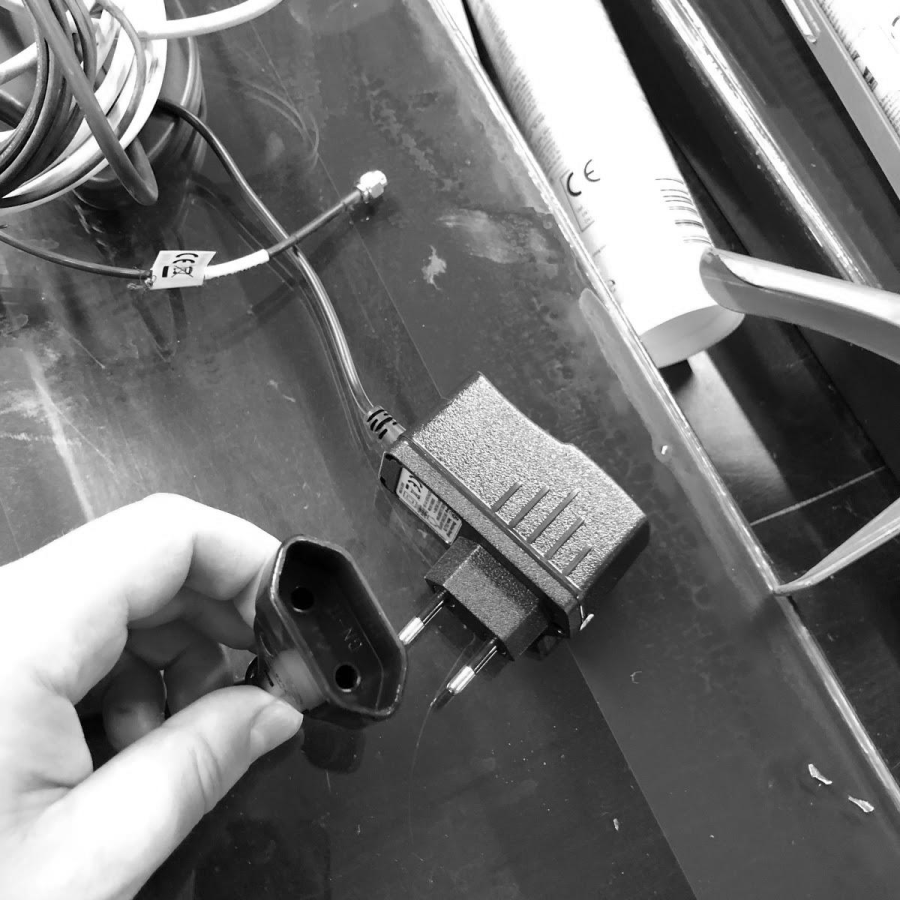
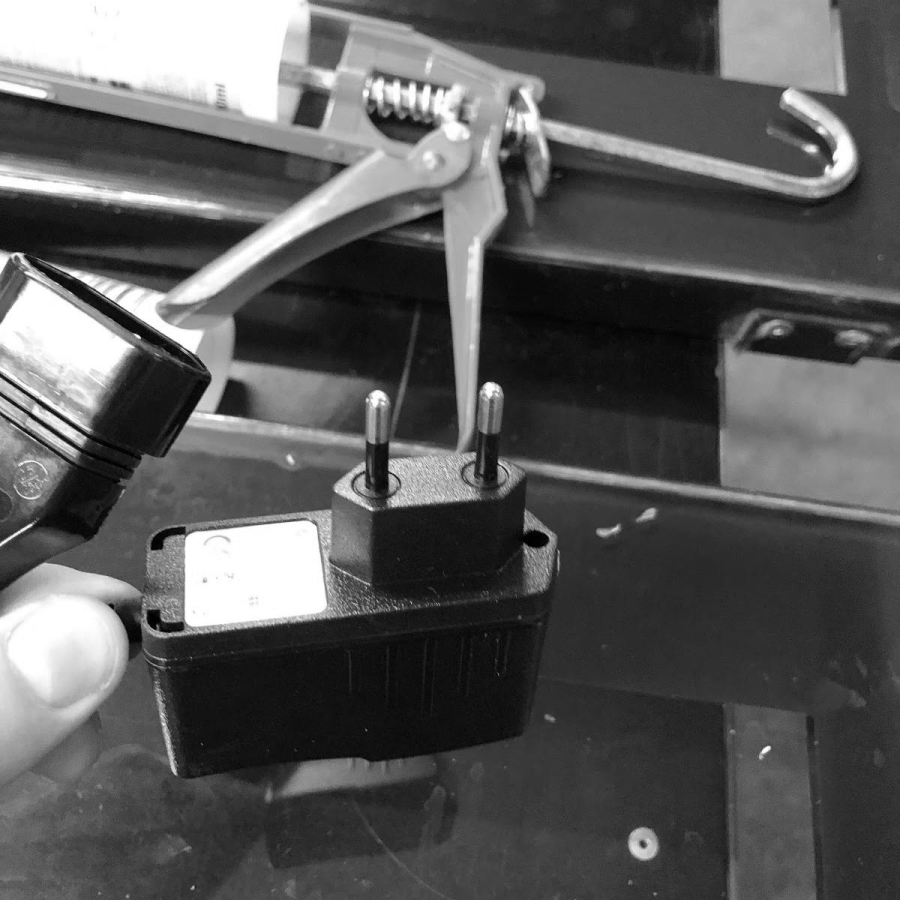
7. Use the power socket shown on the picture for the router power supply (power socket may differ depending on the region):

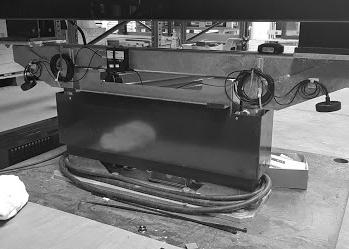
Install the antenna on top of the screen to allow the signal to go through (see image on the right).
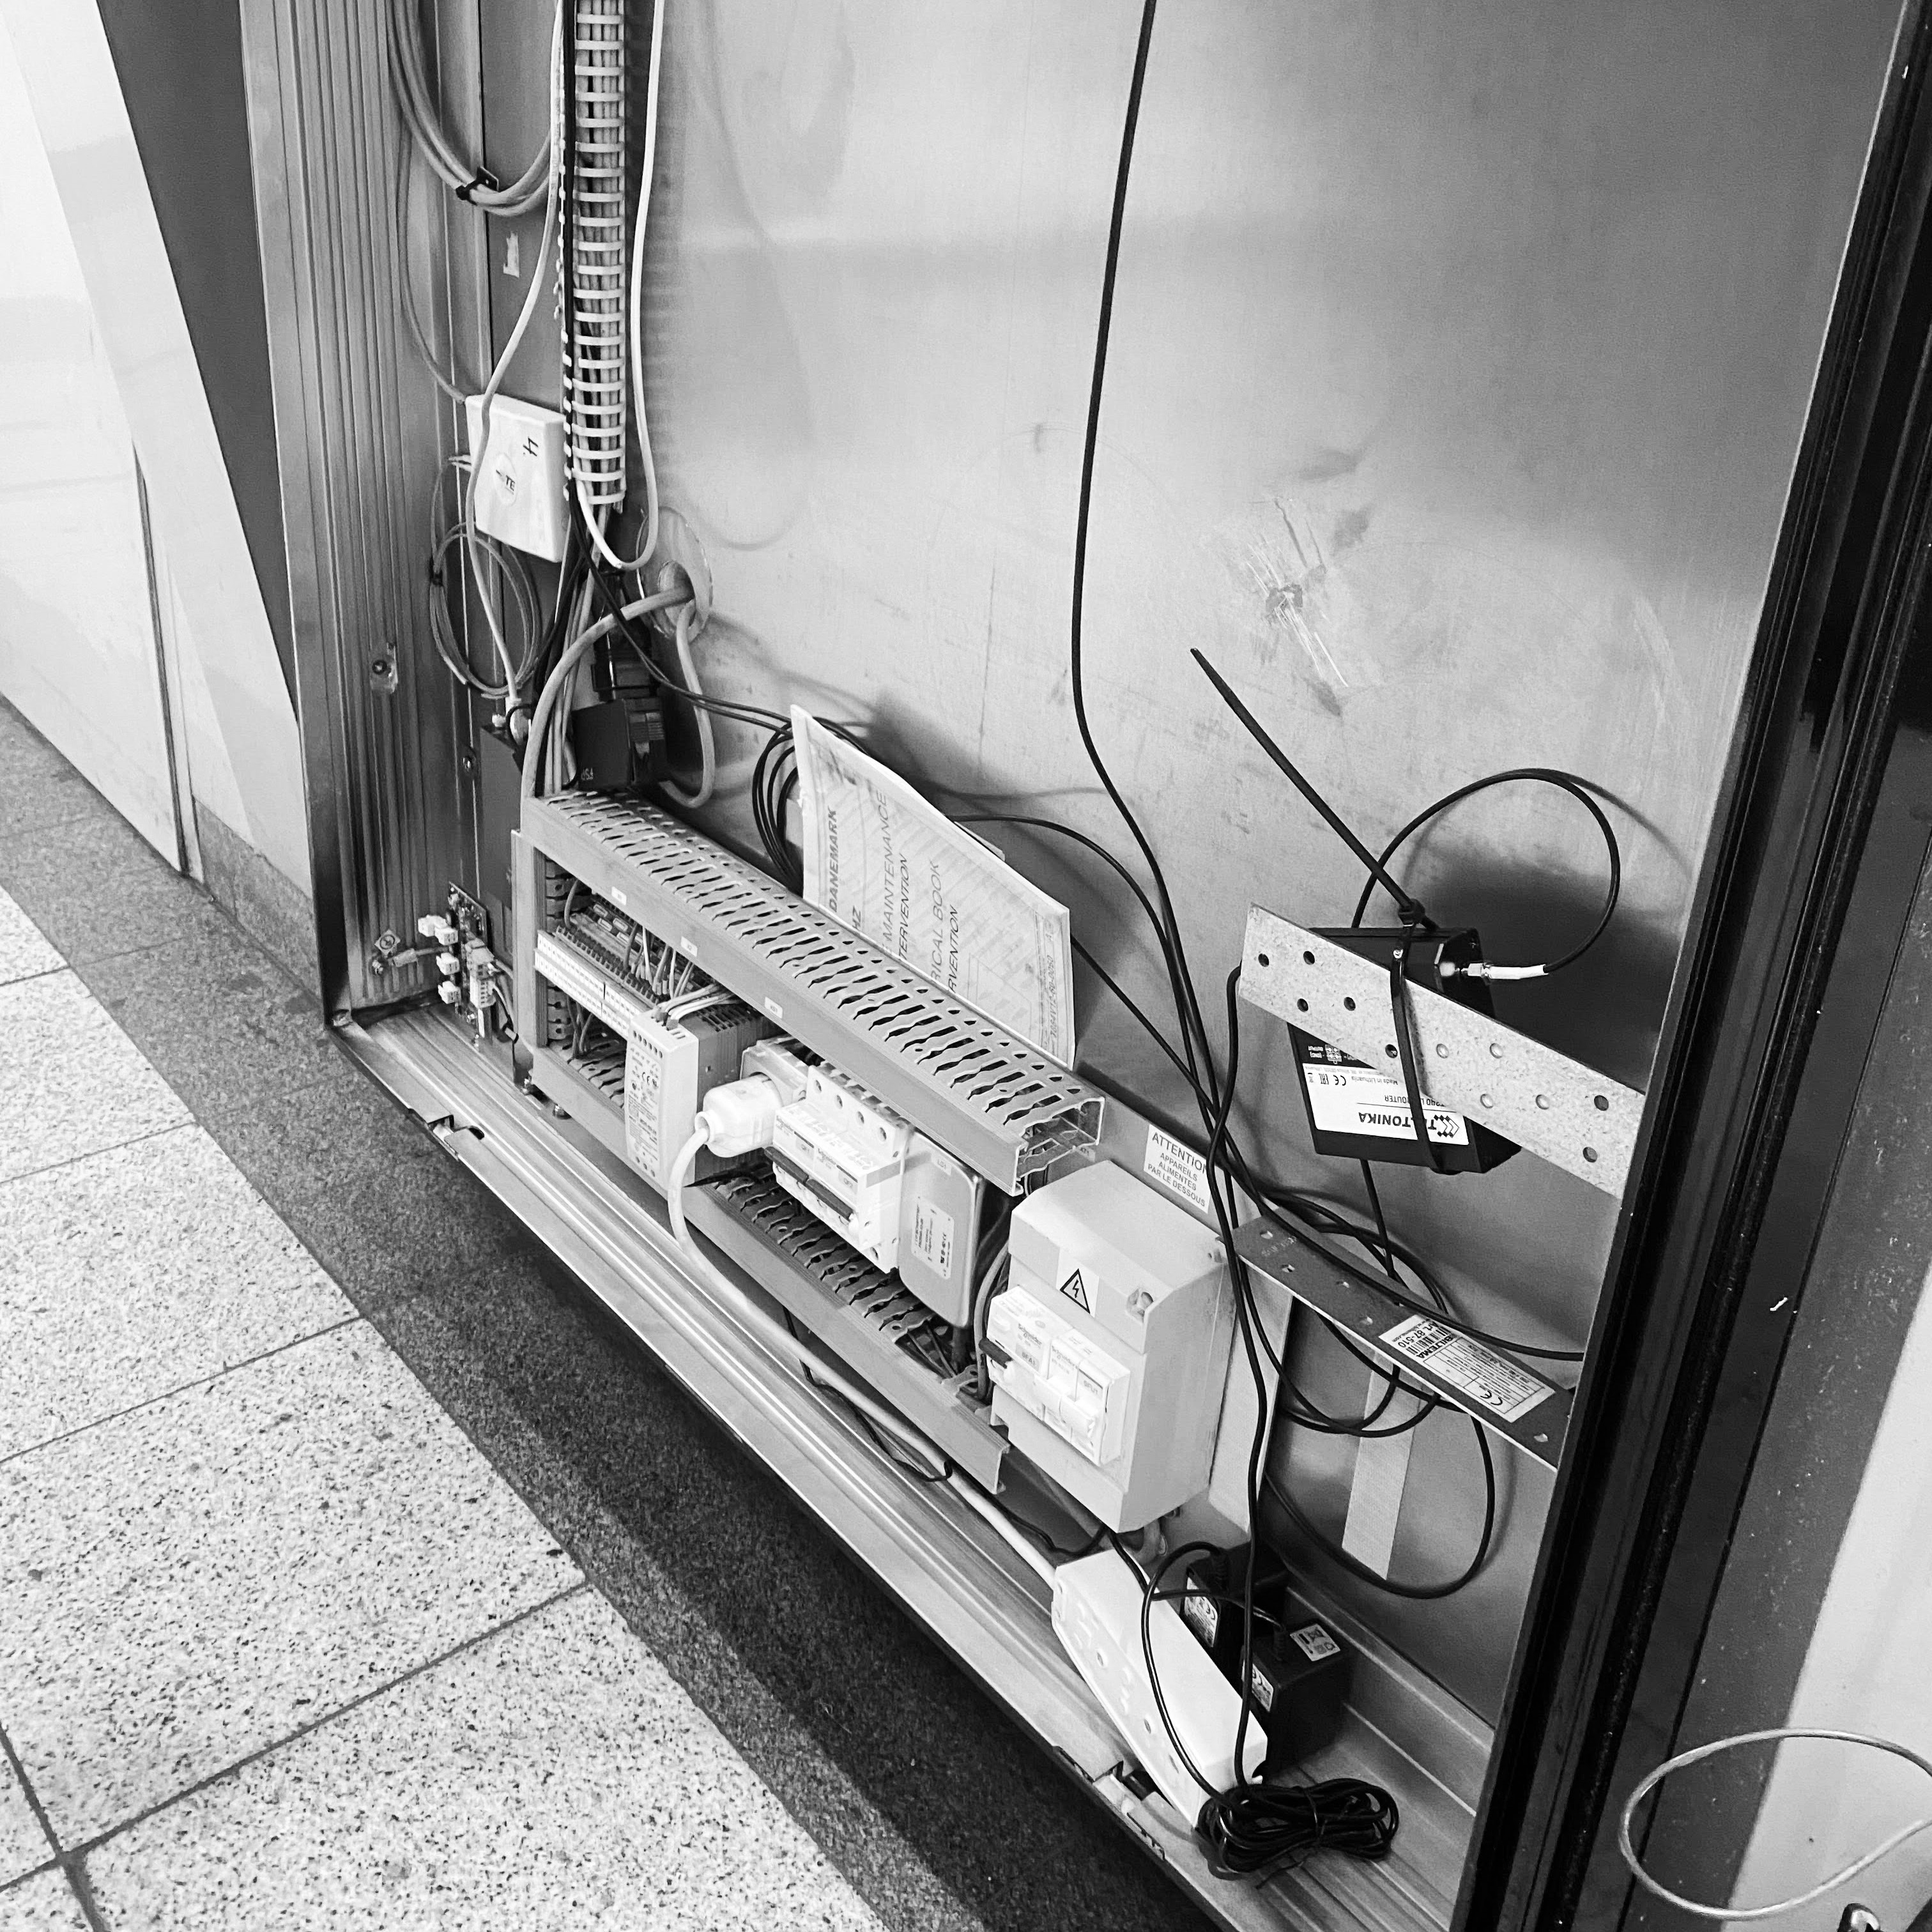
ONLY in the situations when it is absolutely impossible to install the antenna on the top of the screen, it can be installed inside the screen, next to the ventilation opening.
Installing the antenna surrounded by solid metallic parts of the screen disturbs the process of gathering data. Make sure that both devices are installed next to an opening.
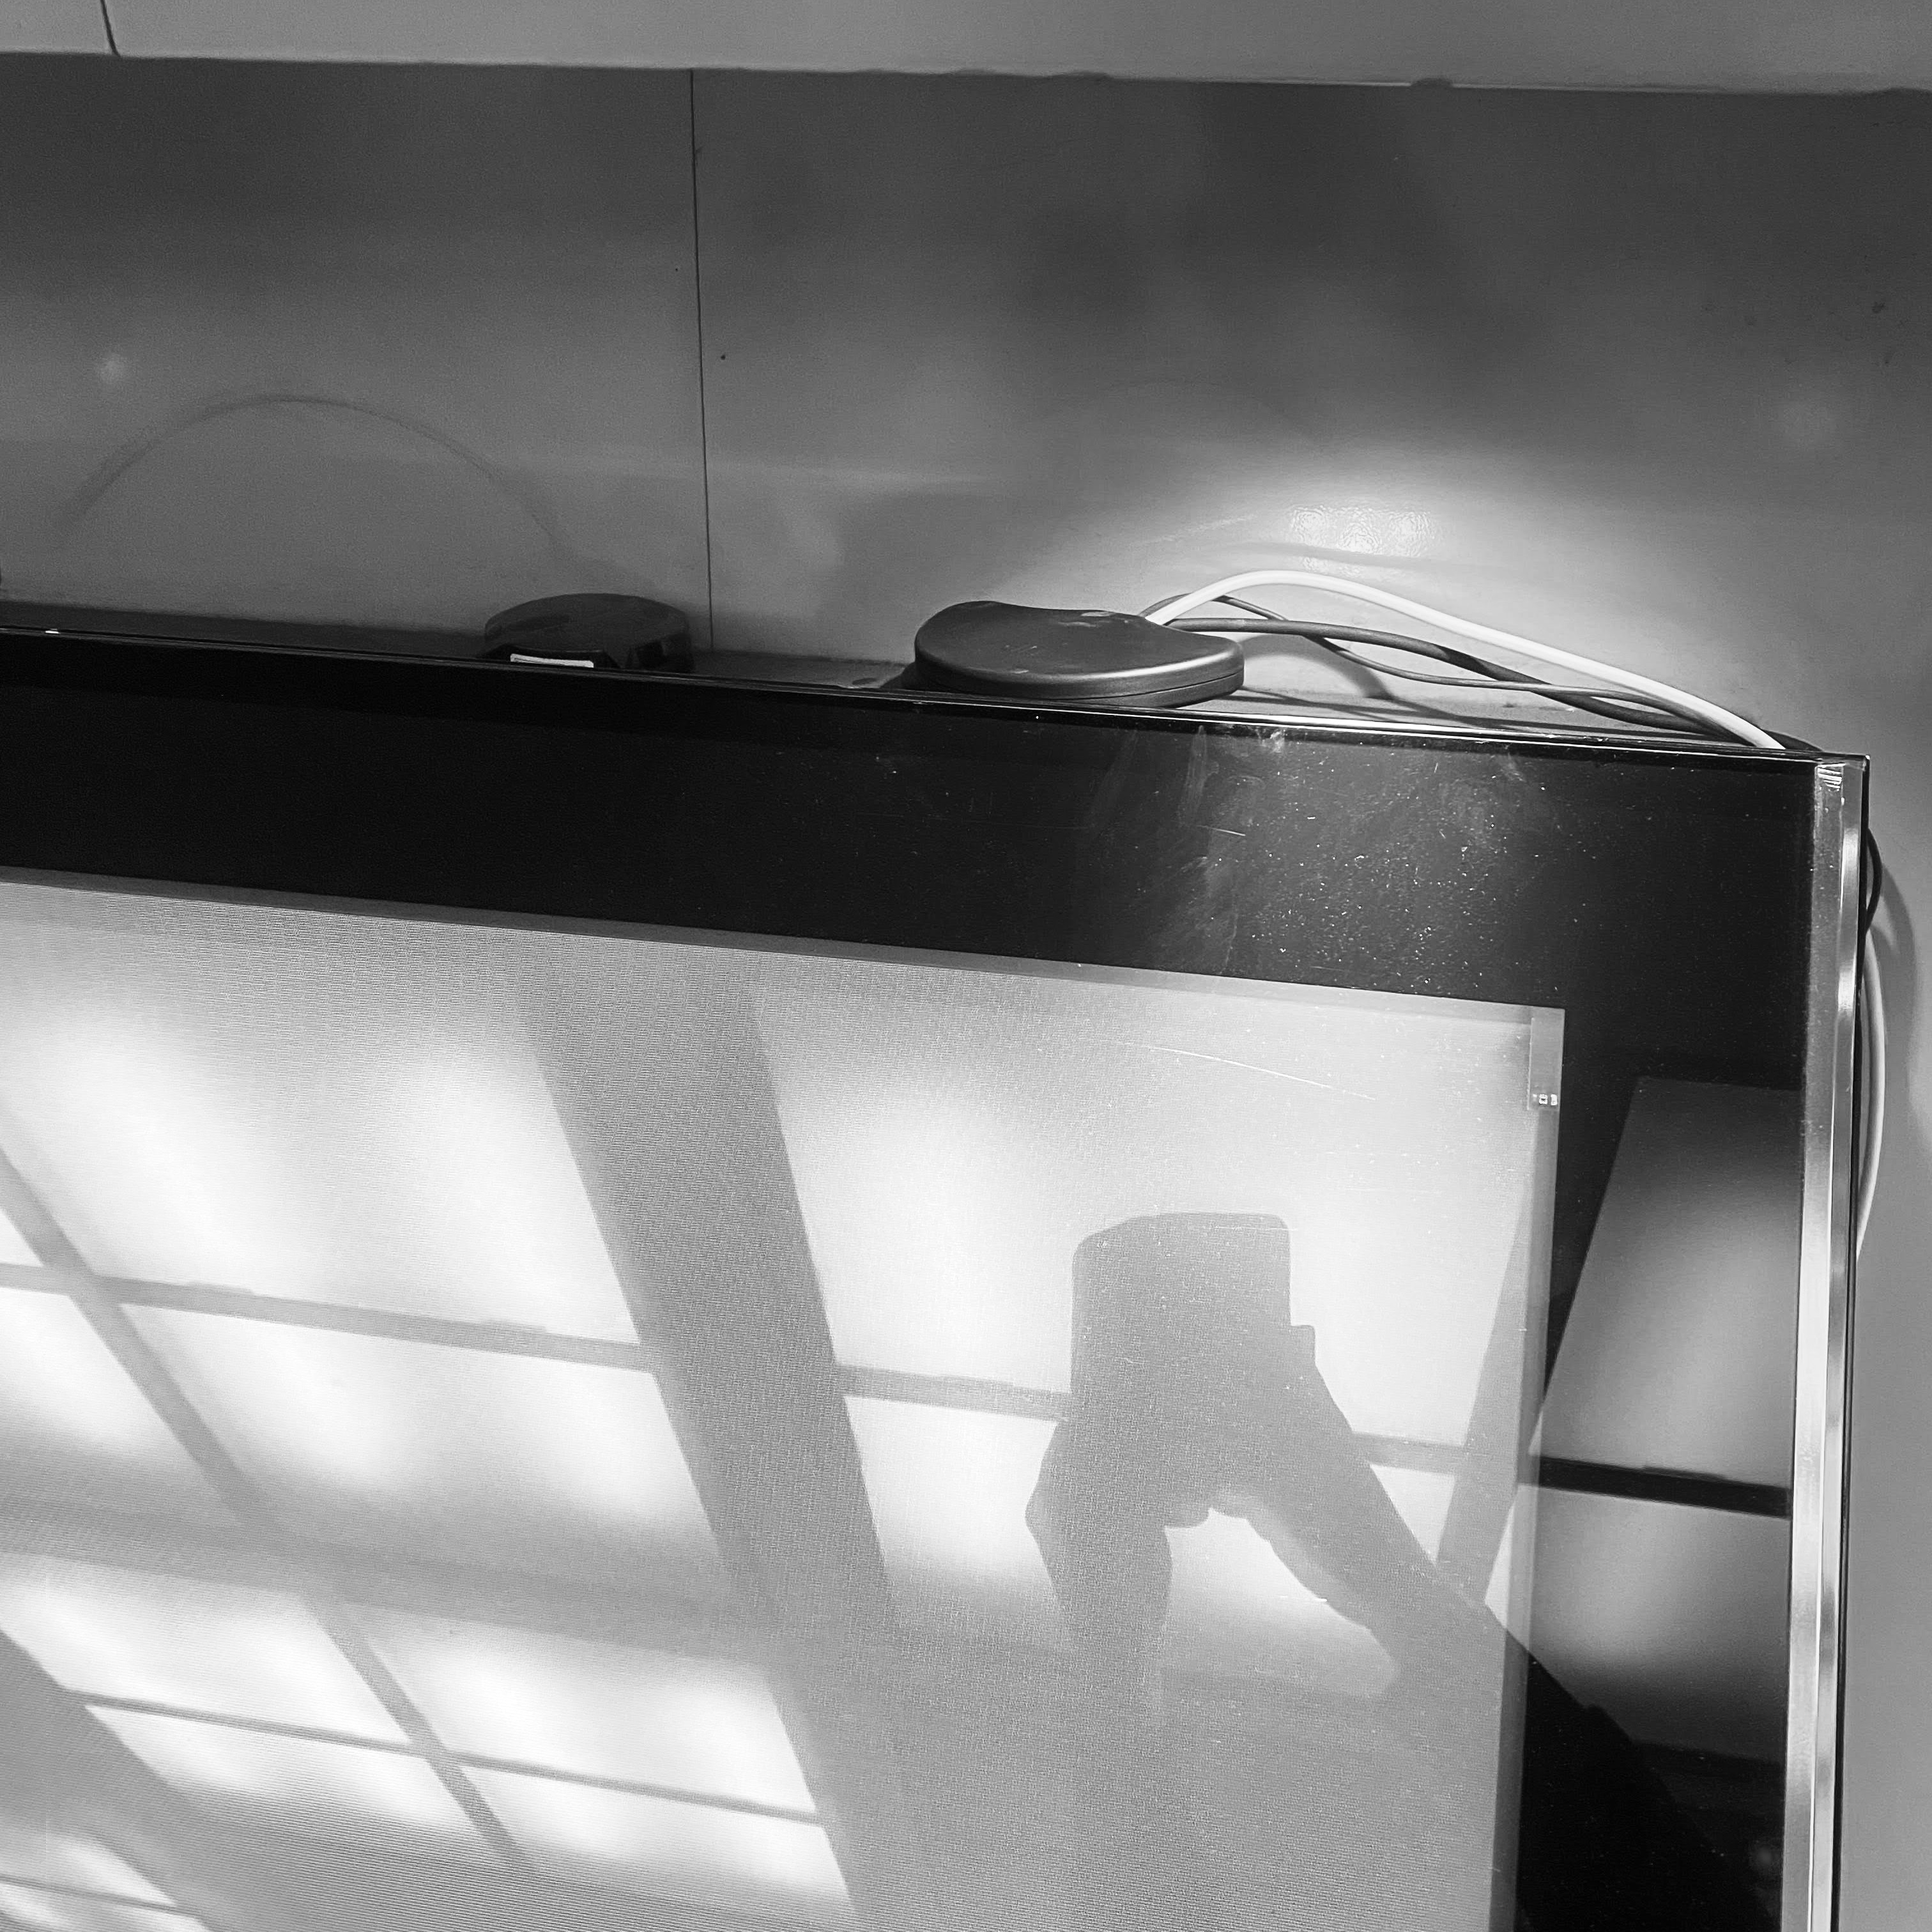
Installation of the antenna on top of the screen:
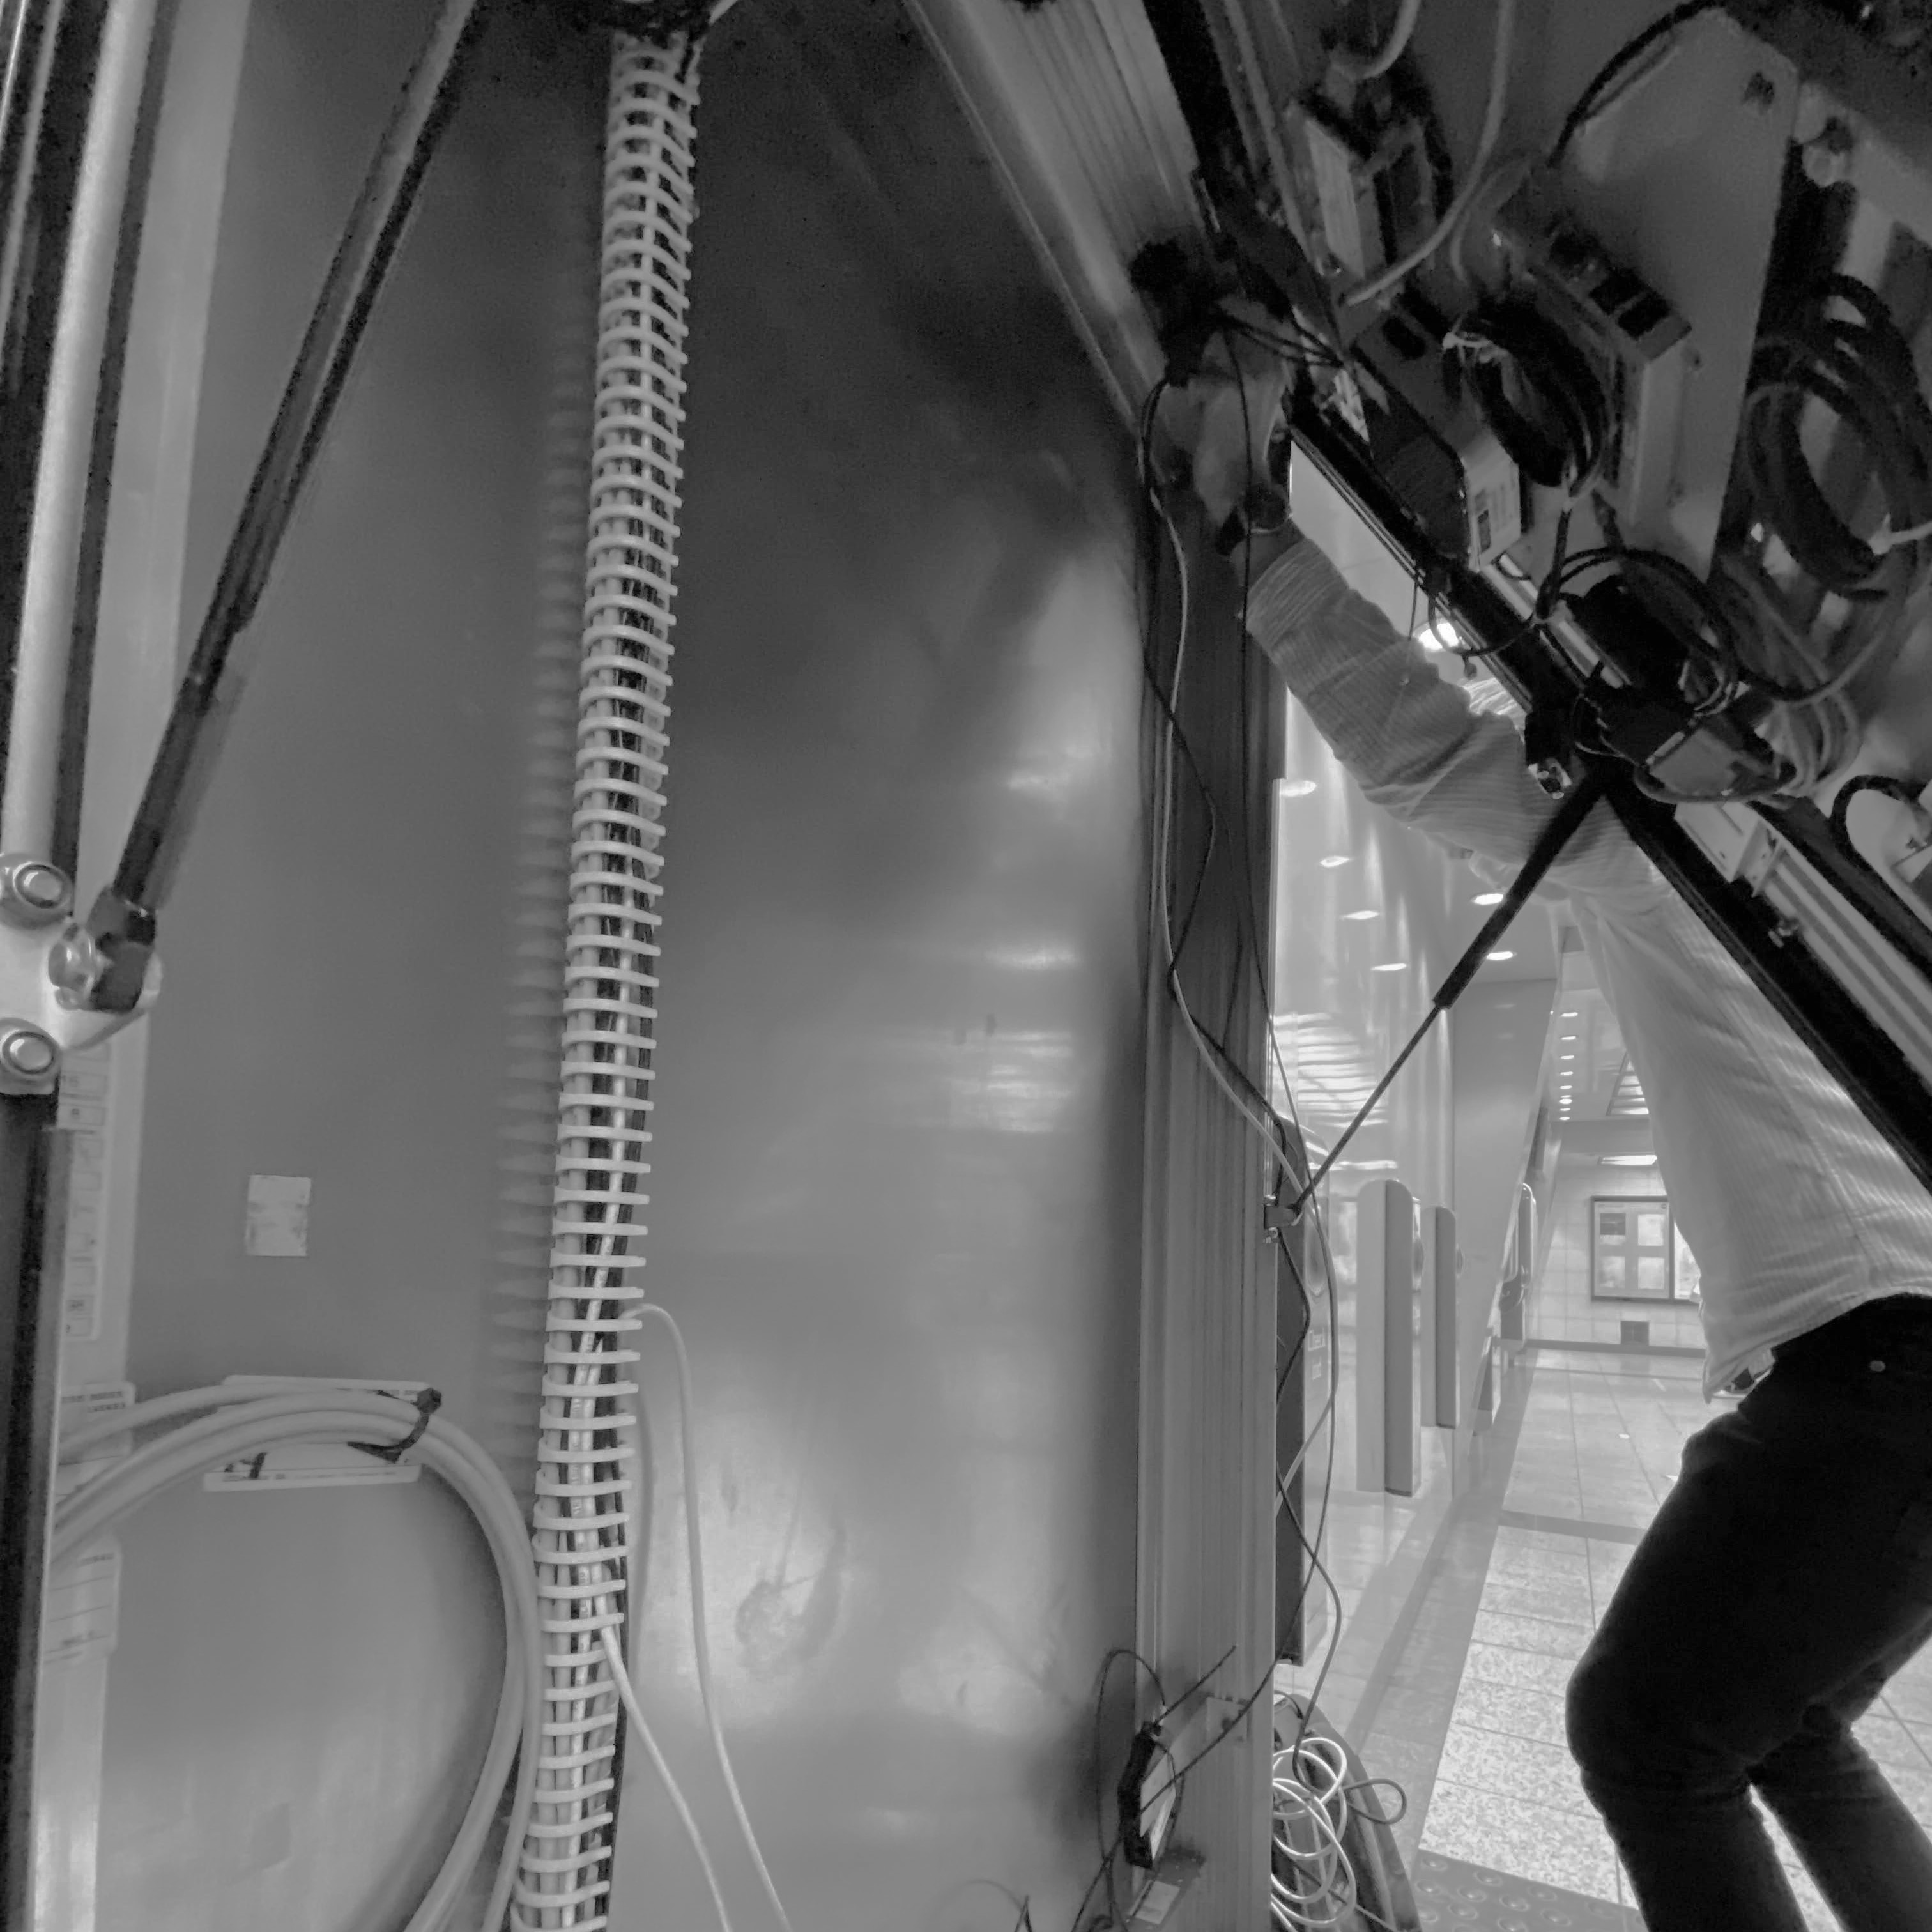
Open the screen to get access to the top ventilation hole.
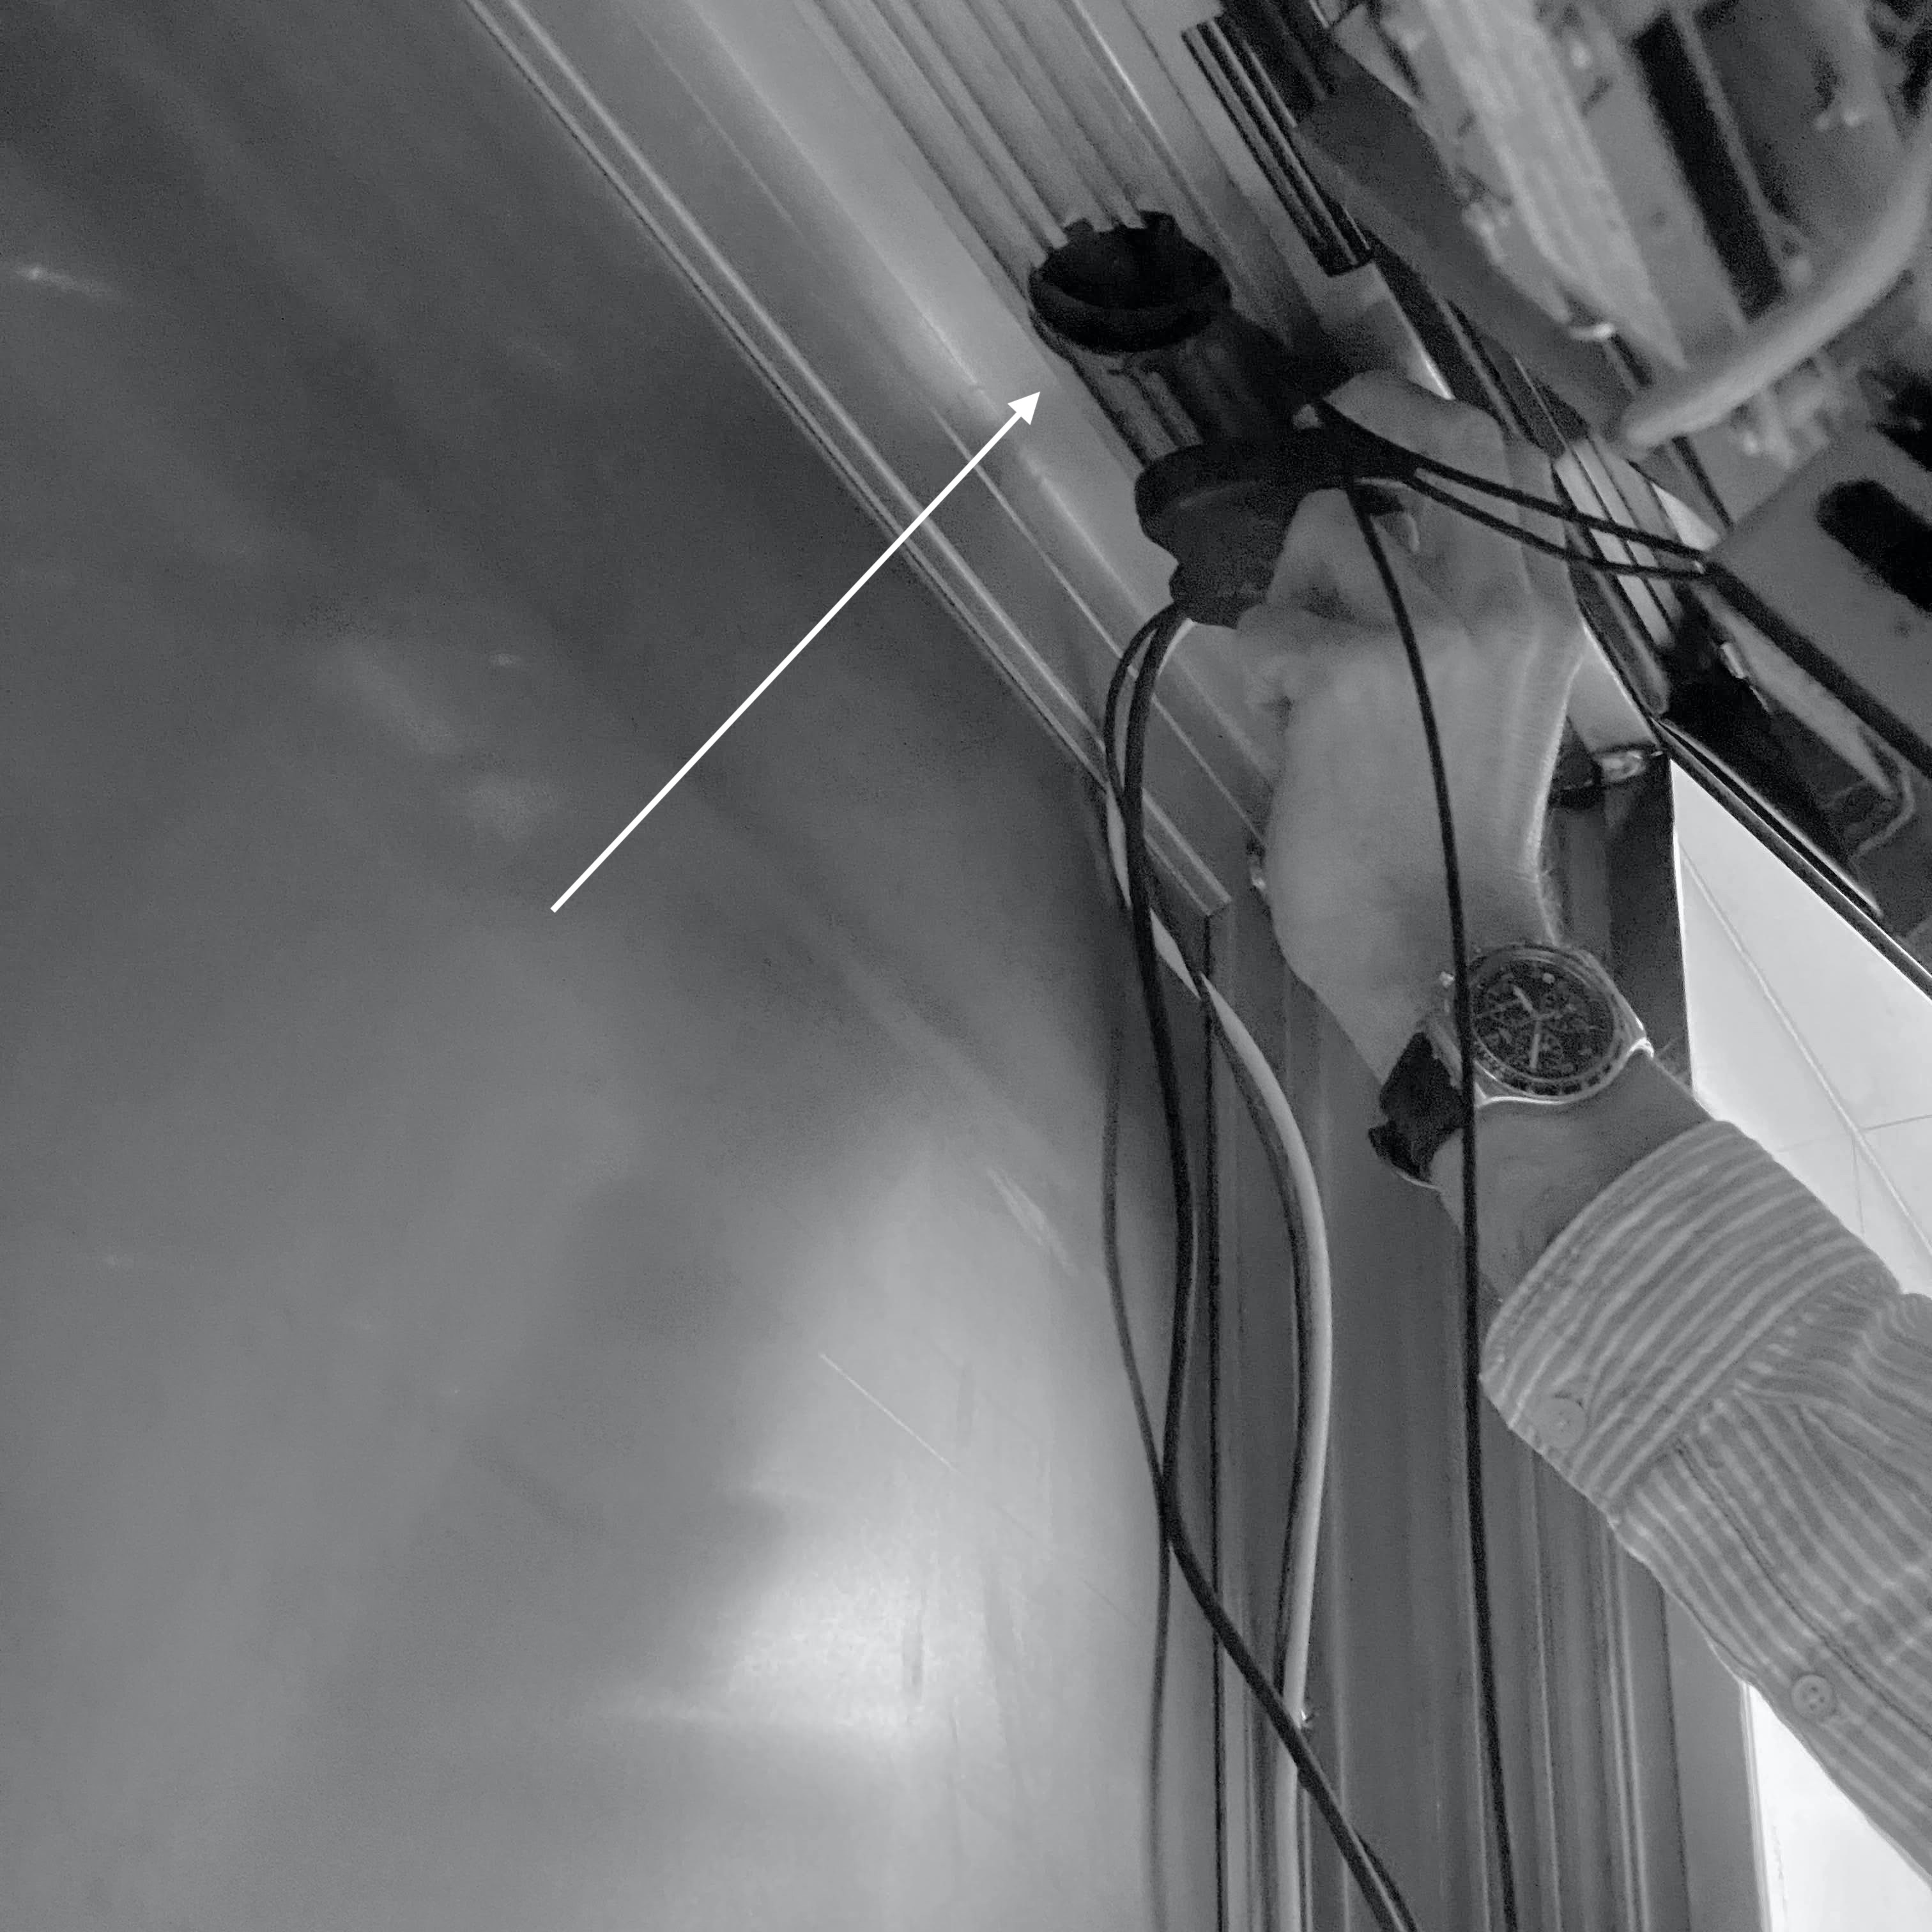
2. Use the ventilation hole to pull the cable through.
3. Mount the router to the screen.
After the equipment is installed, please complete the following steps:
check the signal strength of the installed sensor
take photos of the screen (inside) and the surrounding (360° overview) and later on send them to jcd-support@allunite.com following the guide on How to take and upload photos of the installed sensor.
After AllUnite checks the photos, you will receive a reply with the confirmation that the installation is completed (according to the Warranty terms).
Process of Signal Strength Check
Option 1: Connecting to the hidden network of the installed sensor
All installed sensors have a hidden network which you can connect to for troubleshooting and status information purposes. To connect, please use the following credentials:
SSID: allunite-setup-XXXX
Where XXXX is the last four symbols of the needed sensor MAC address
Password: ********-should be asked from JCDecaux operations
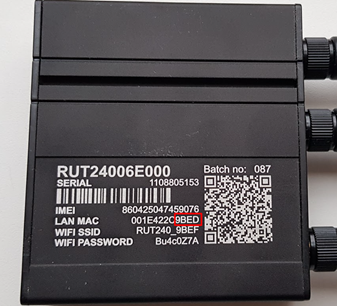
Correct MAC address of the sensor you can find:
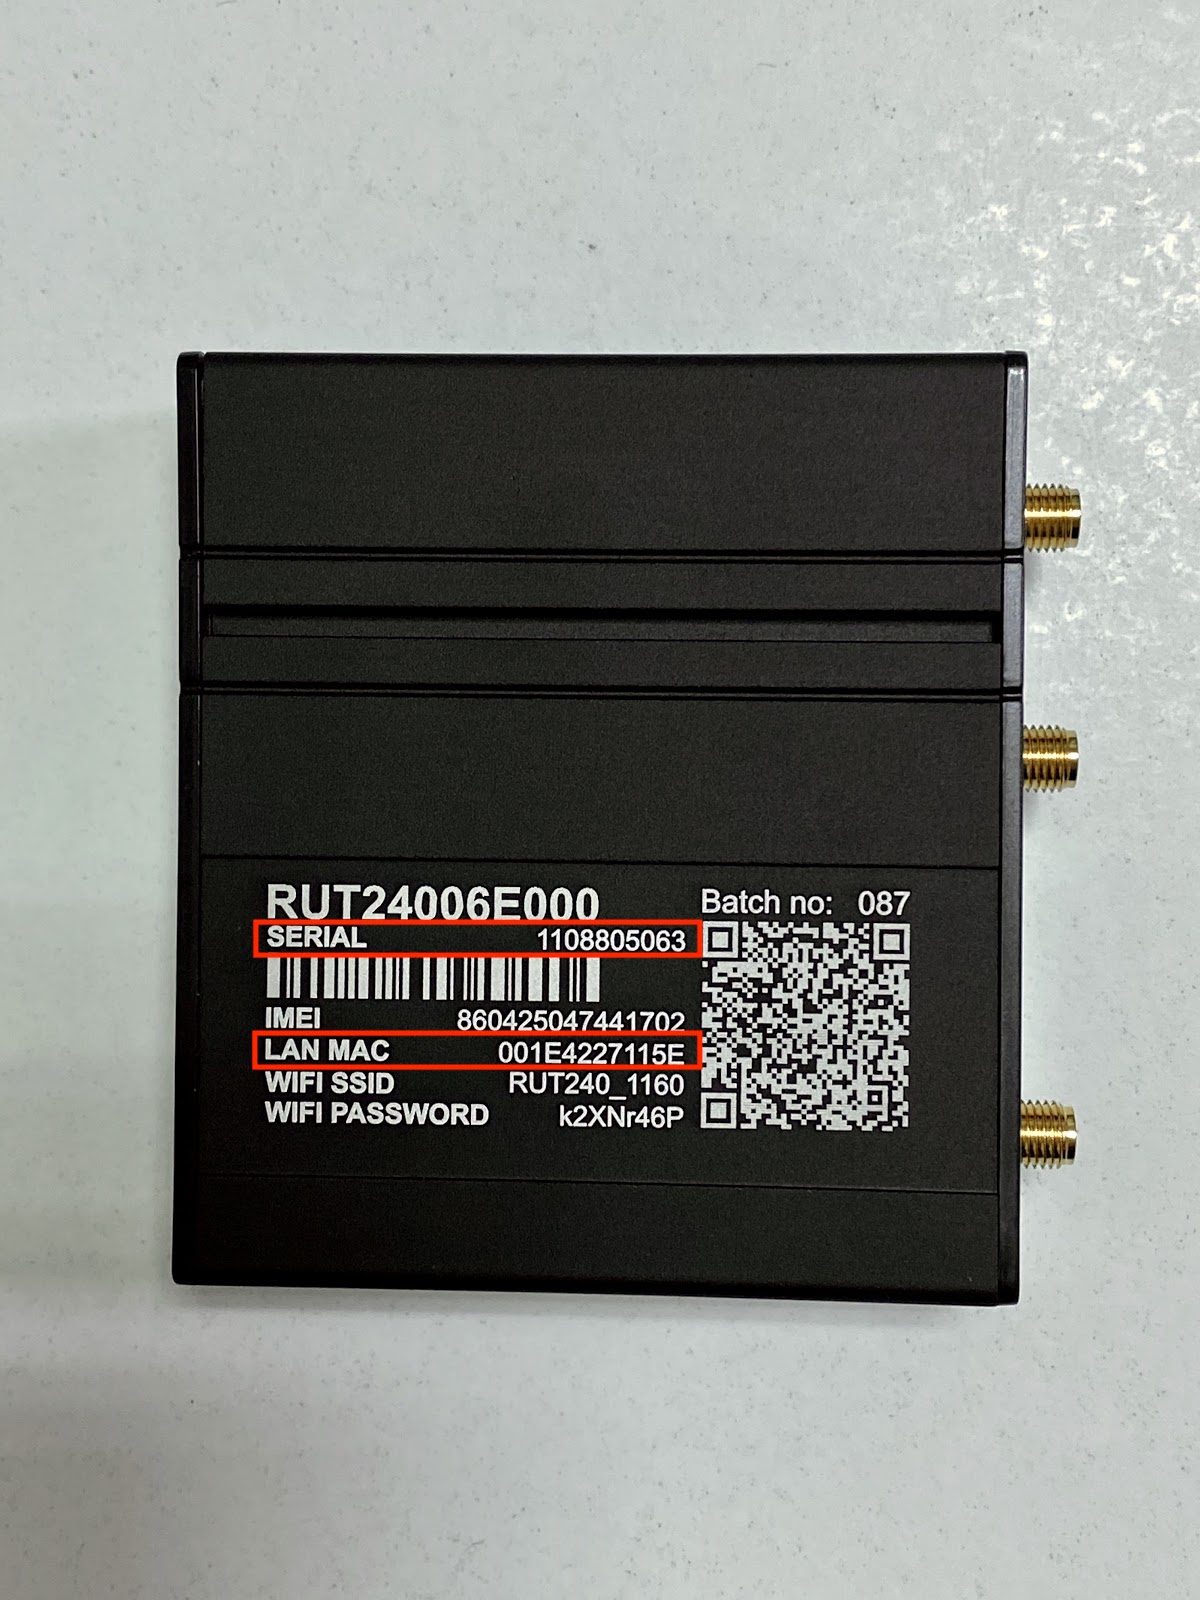
On the label of the sensor (pic below)
In monitoring system – RMS

Very important to have actual info in RMS
Please, follow the steps to connect to a hidden network (according to your operating system and device):
iOS:
Select Settings > Wi-Fi > Other.
Enter the network name, security type, and password. Tap Join.
Android:
Setting menus differ for each device. In most cases, you can follow this procedure to connect to a hidden network:
Select Settings > Wi-Fi > Add Wi-Fi network.
Enter the network name (SSID), security type, and password. Tap Connect.
Windows 10:
In the lower-right corner of your screen, click the WiFi icon.
Click Network Settings > Wi-Fi > Hidden Network > Connect.
Enter the SSID
Click Next.
Enter the network security key (password).
Click Next.
Windows 8:
In the lower-right corner of your screen, click the WiFi icon.
Click Open Network and Sharing Center.
Select Set up a new connection or network.
Click Next.
Select Manually connect to a wireless network.
Click Next.
Enter the Network name, Security type, Encryption type, and Security Key (password).
Click Next.
Windows 7, Vista:
Select Control Panel > Network and Sharing Center > Manage Wireless Networks.
Click Add > Manually create a network profile.
Enter the Network name, Security type, Encryption type, and Security Key (password).
Select Start this connection automatically.
Select Connect even if the network is not broadcasting.
Click Next.
Linux:
Open the system menu.
For more information, refer to your device’s user manual.Select Wi-Fi Not Connected.
The Wi-Fi menu displays.Click Wi-Fi Settings > Connect to Hidden Network.
In the Connection drop-down list, select New.
Enter the Network name, Wi-Fi security type, and password.
Click Connect.
Mac OS X:
In the upper-right corner of your screen, click the WiFi icon.
A network menu appears.Click Join Other Network.
Enter the Network Name, Security type, and Password.
If you want to automatically connect to this network in the future, select Remember this network.
Click Join.
How to check the signal strength
After connecting to the hidden network, you need to open the information page of the sensor in the browser. To do so, you need to open a browser, enter the address sensor.allunite.com (alternatively 192.168.9.1/cgi-bin/luci/allunite) in the address bar, and an information page should open (example below). Check the network status and signal strength. Received signal strength indicator (RSSI) measured in dBm. Values closer to 0 indicate better signal strength.>= -80 dBm
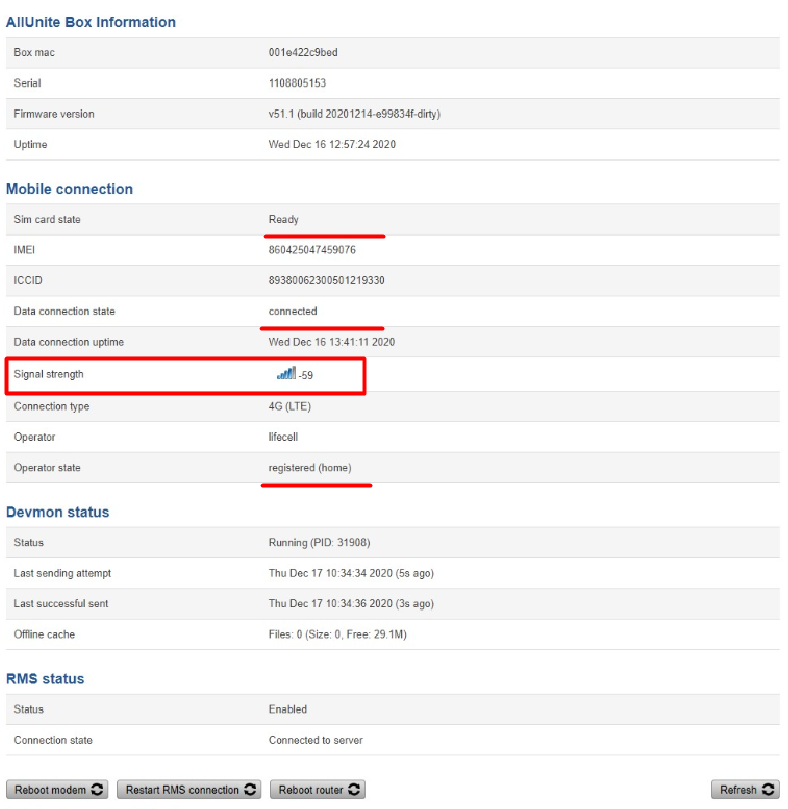
Recommended signal strength should be no less than -80 dBm
If the sensor is offline or with a bad signal when checking the status, then you need to use AllUnite troubleshooting guide.
Option 2: Accessing Teltonika RMS
You can check the connection strength only after the device was added to RMS. In case RMS remains on AllUnite's tenant - the boxes are added by AllUnite before the shipment. Otherwise, you should add boxes by yourself before the installation.
To do so, please follow the steps described in Process of Adding a New Device to RMS section. In order to check the connection strength you need to:
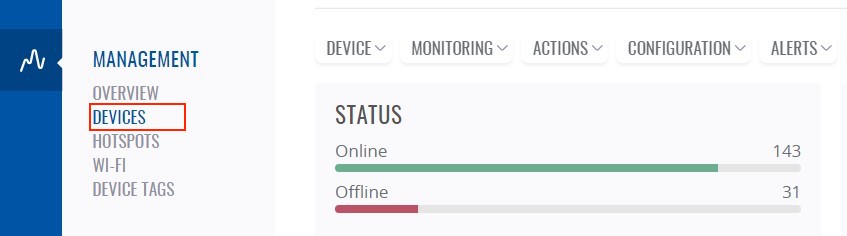
Go to Management and select Devices. In the list of devices, find the newly installed device:

Click on
 (“Device details”) in Actions column:
In the Mobile Status section, you can see the current Network signal strength:
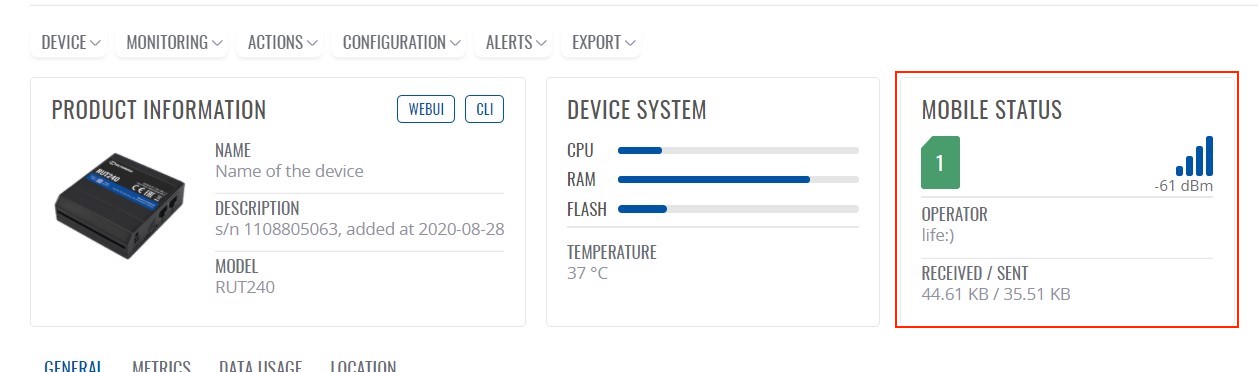
Recommended signal strength should be no less than -80 dBm
RSRP | Signal Strength | Description |
|---|---|---|
>= -80 dBm | Excellent | Strong signal with the maximum data speed |
-80 dBm to -90 dBm | Good | Strong signal with the good data speed |
-90 dBm to -100 dBm | Fair to poor | Reliable data speed may be attained, but marginal data with drop-out is possible. When this value gets close to -100 dBm, performance will drop drastically. |
<= -100 dBm | No signal | Disconnection |
Process of Adding a New Device to RMS
In case RMS remains on AllUnite's tenant - skip this step
Login to RMS using your account credentials
Go to Management section and click on Device In case RMS remains on AllUnite's tenant - skip these steps:
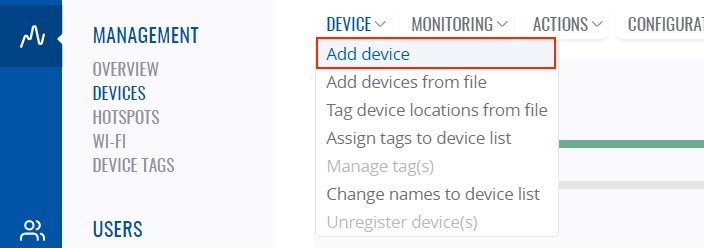
Click on Device tab to open a drop-down menu and select Add device:
In the open window, please fill in:
Company Name - select from a drop-down menu
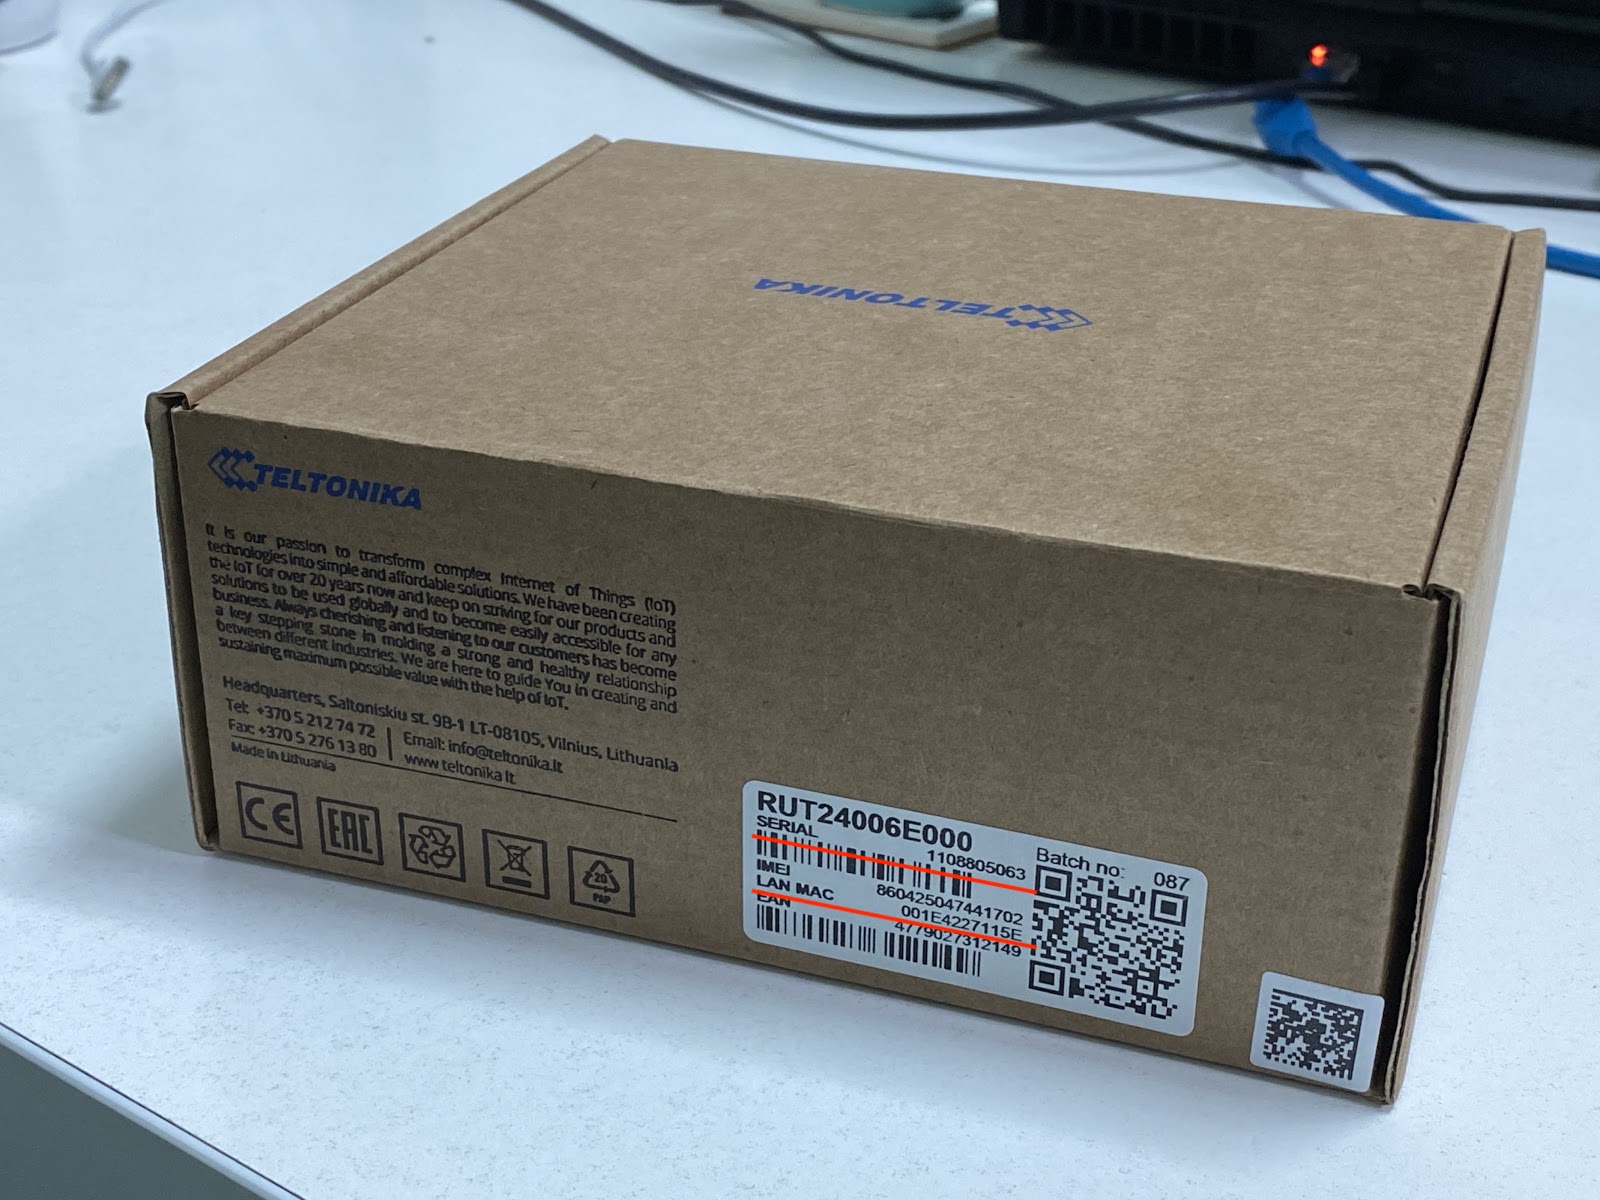
Enter Serial number & MAC Address of the device (these digits are shown on the box label and the back of the router)
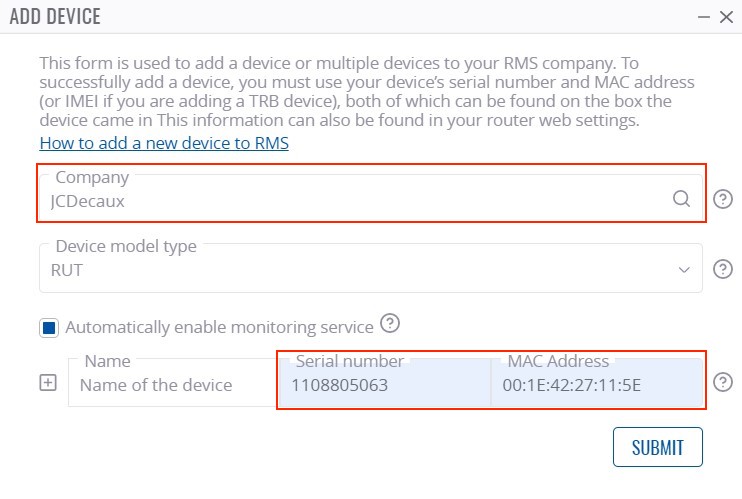
After the information is added, click Submit button.
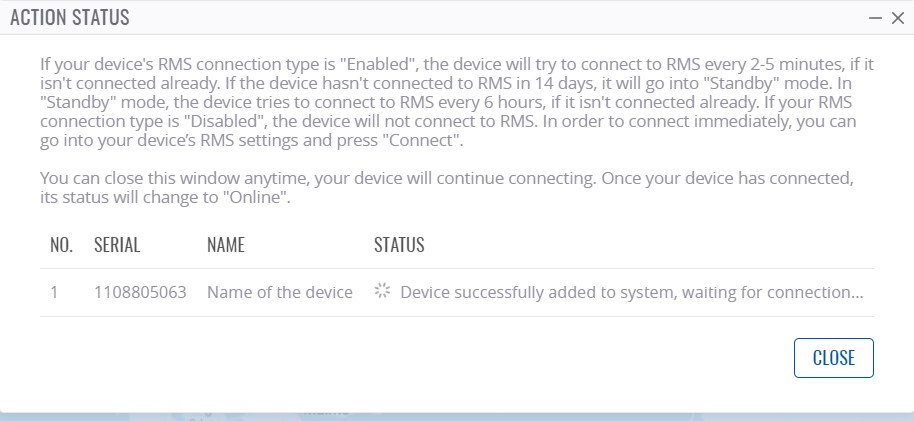
You will see the message that the device is successfully added to RMS. It may take 2-5 minutes for the device to connect:
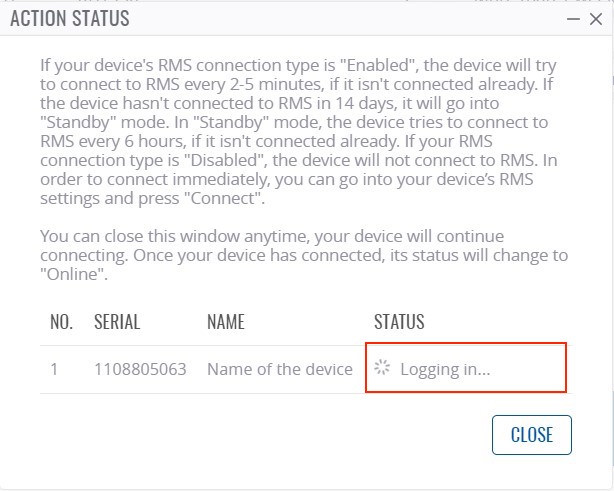
When the connection is established, you will see Logging in message:
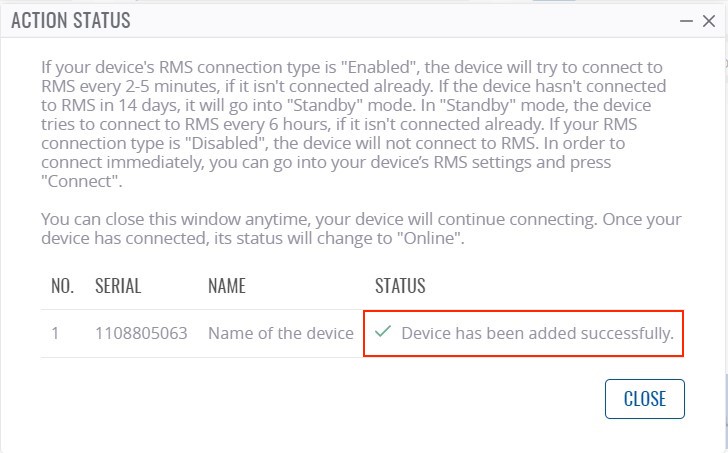
When the device connects to RMS you will see the message “Device has been added successfully”:
If the device is added successfully, it will be shown in the list of the devices with a green point. The green colour means that the device is connected to RMS and is Online.
If you have any questions regarding the installation for in cases when troubleshooting is needed, please reach out to AllUnite Customer Support team via email jcd-support@allunite.com or one of the local phone numbers: Denmark +45 7876 8363.
This installation guide was based on AllUnite equipment deployment in Denmark in the following screen types:
Digi 70" DS Air Ivision Mall
Digi 70" DS Ivision Mall
Digi 70" DS Kort Ivision Rail
Digi 70" SS Ivision Mall
Digi 70" SS Mellem Ivision Mall
Digi 70" Væg Ivision Rail
Digi 70" Væg Kort Ivision Rail
Digi 80" SS Ivision Rail
Digi 80" Væg Ivision Rail
Digi 84" DS Forum Rail
Digi 84" DS Holscher City
Digi 84" Fast-Digi Holscher City