How to take and upload photos of the installed sensor
First things first
Make sure to write down/take a photo of AllUnite sensor Serial Number and MAC Address (it can be found on the label on sensors backside)
Proceed to installation according to the “AllUnite Equipment Installation Guide” up to the point when the sensor is installed but the screen was not re-assembled back yet.
Photo requirements
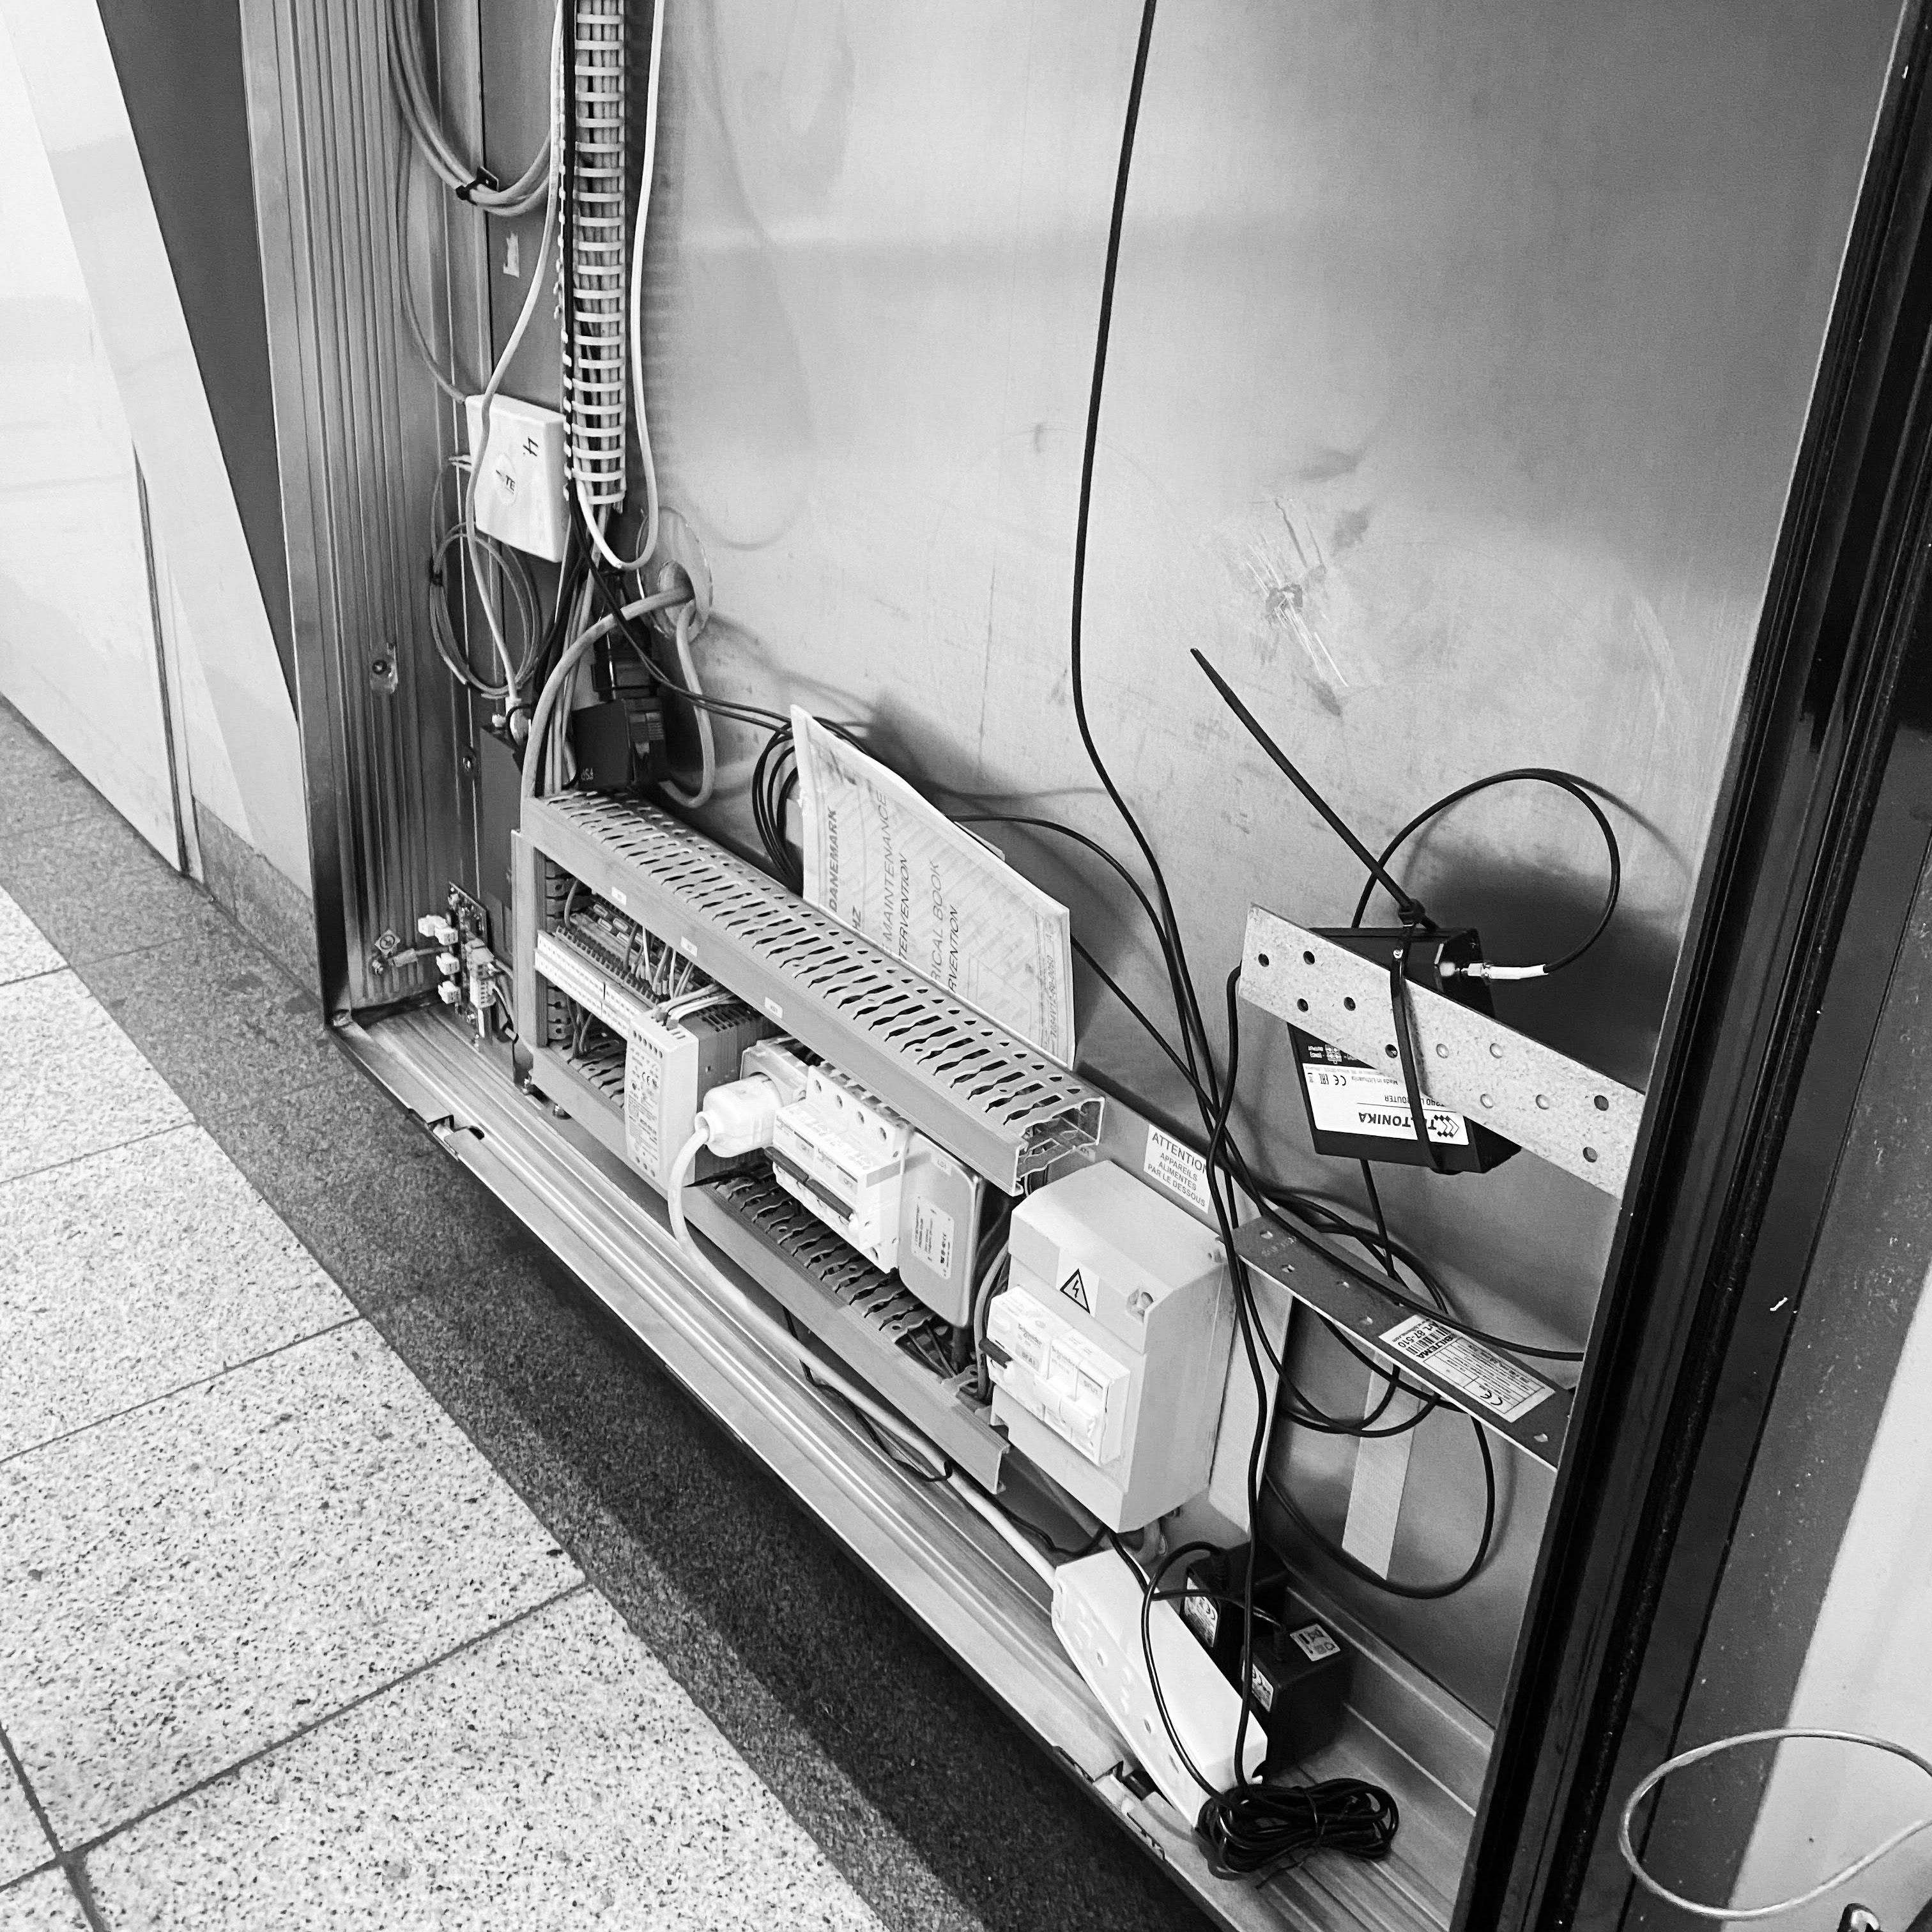
Screen compartment
After finishing the sensor installation, take a photo of its positioning within the screen’s compartment.
Optionally, in the same shot capture the inside wiring.
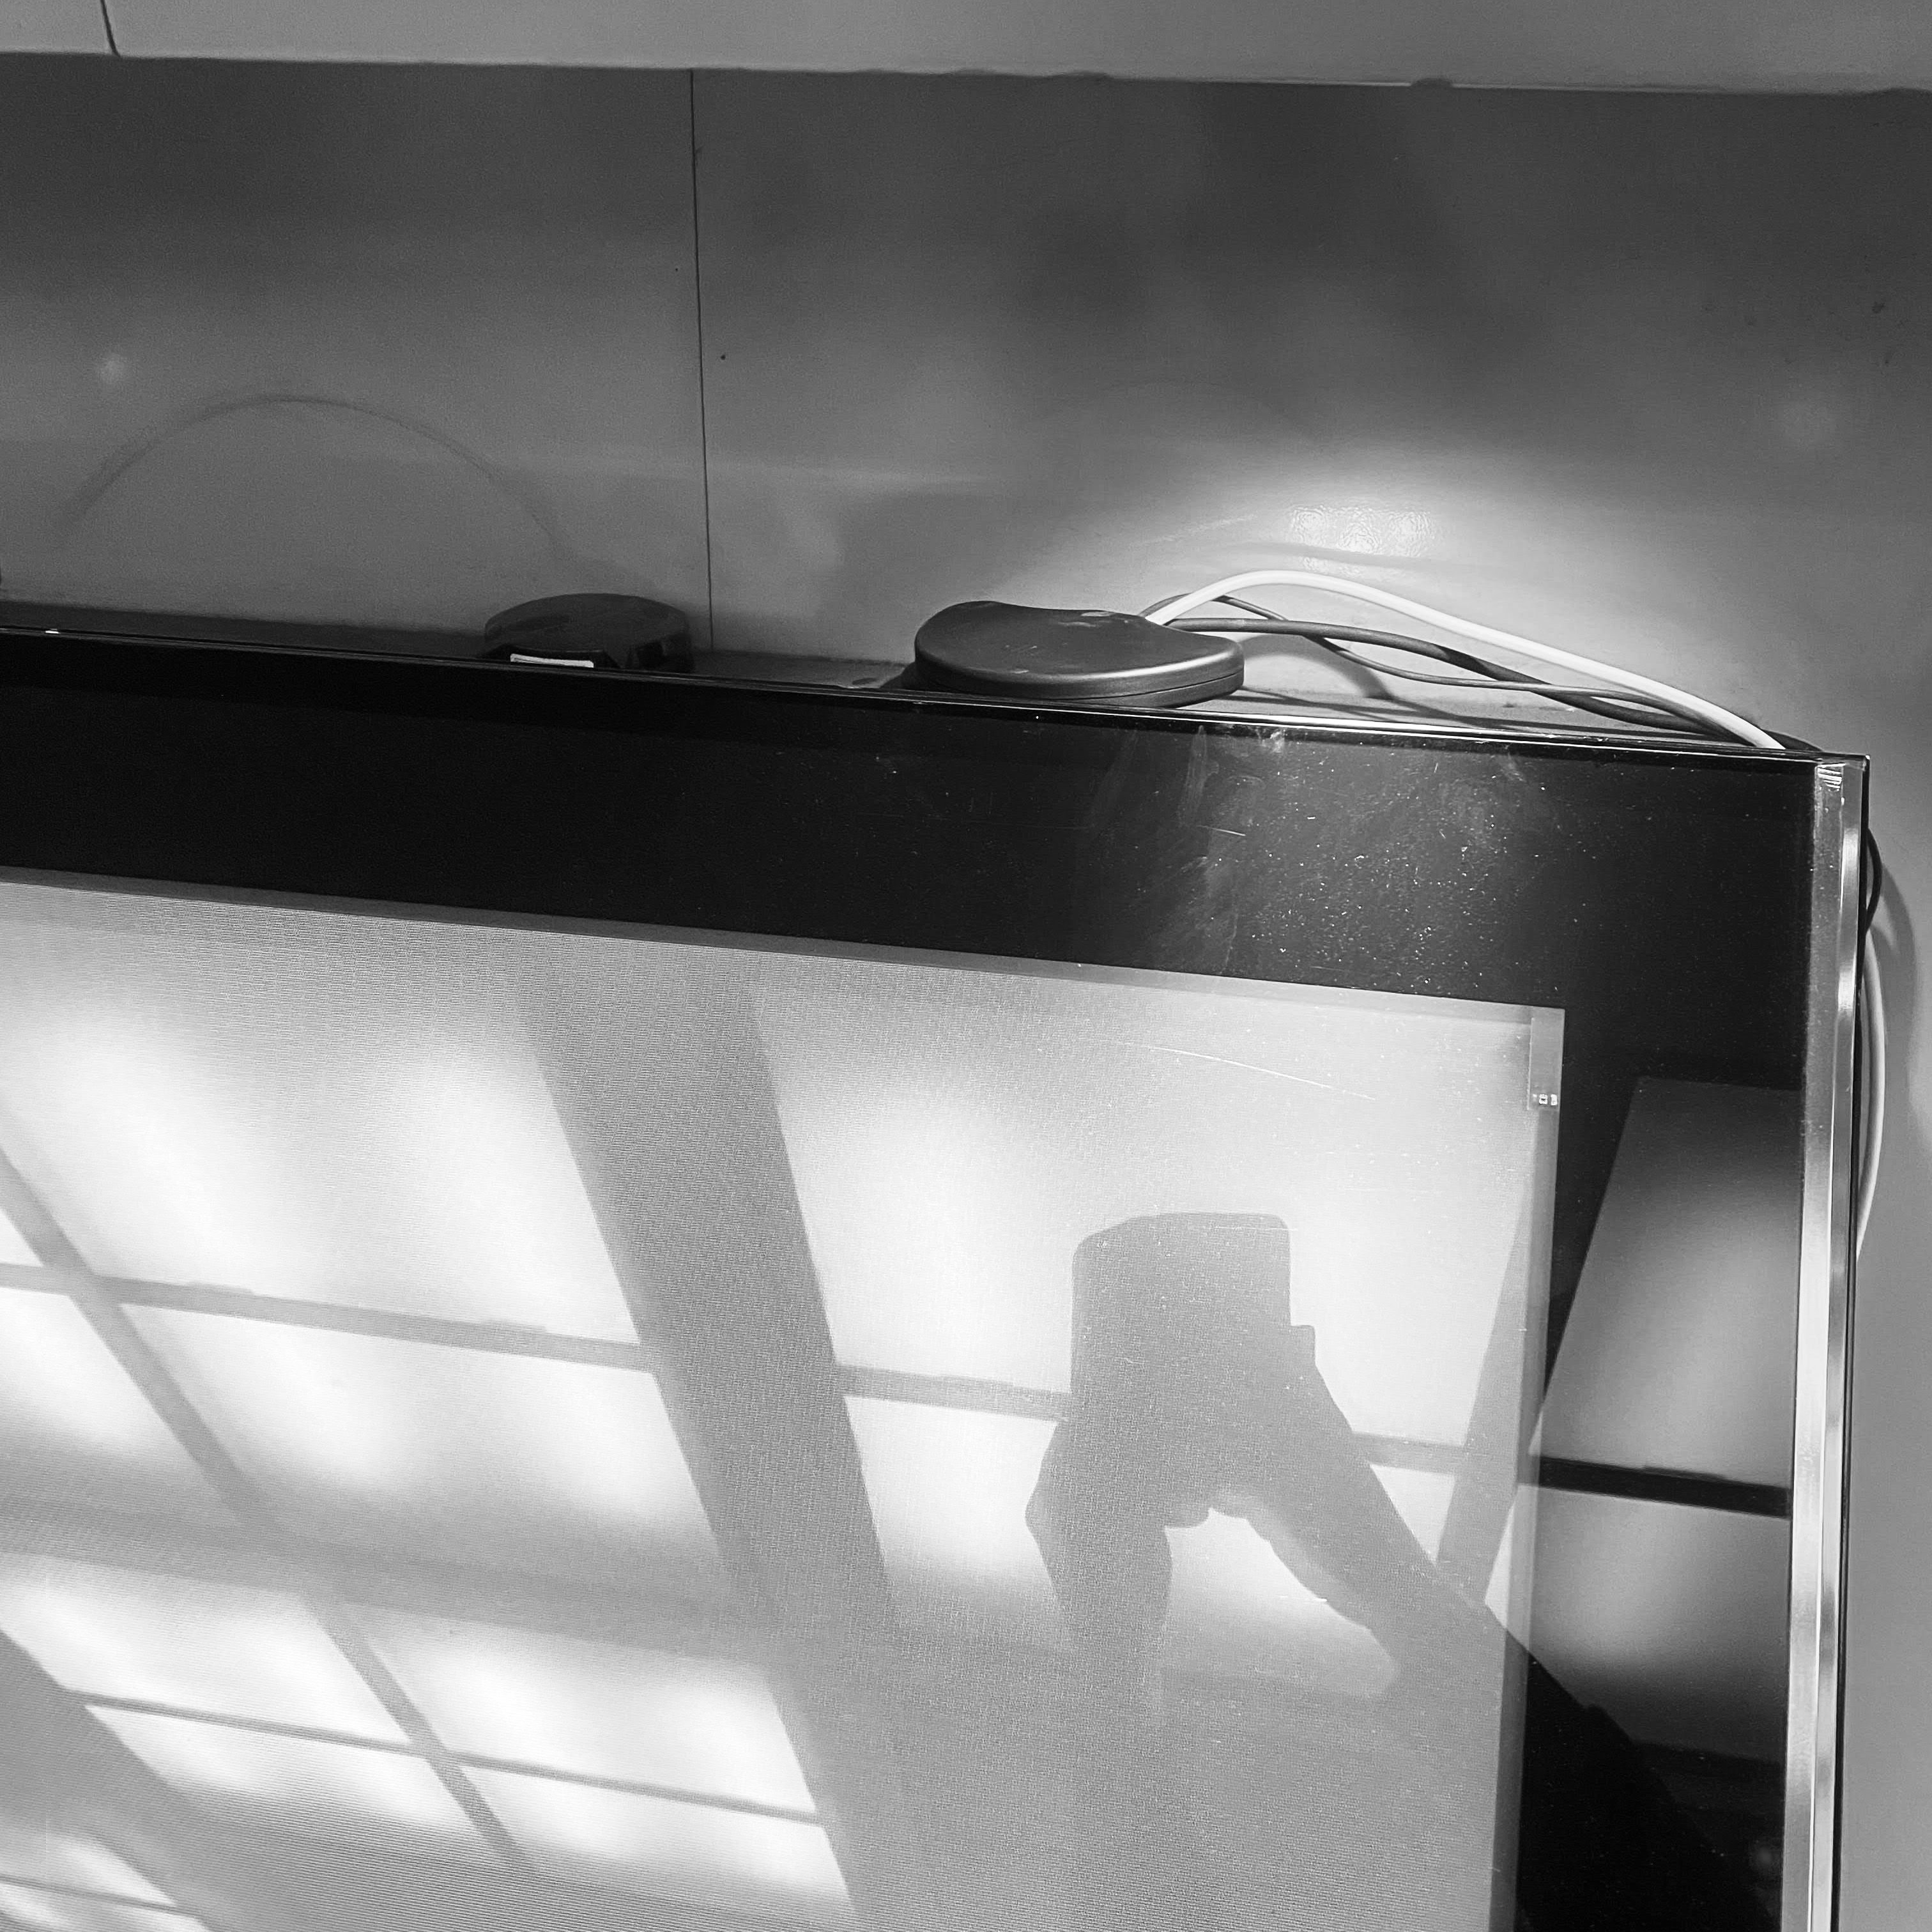
Depending on where the antenna is installed, take a photo of her positioning on top of the screen or near screen ventilation hole.
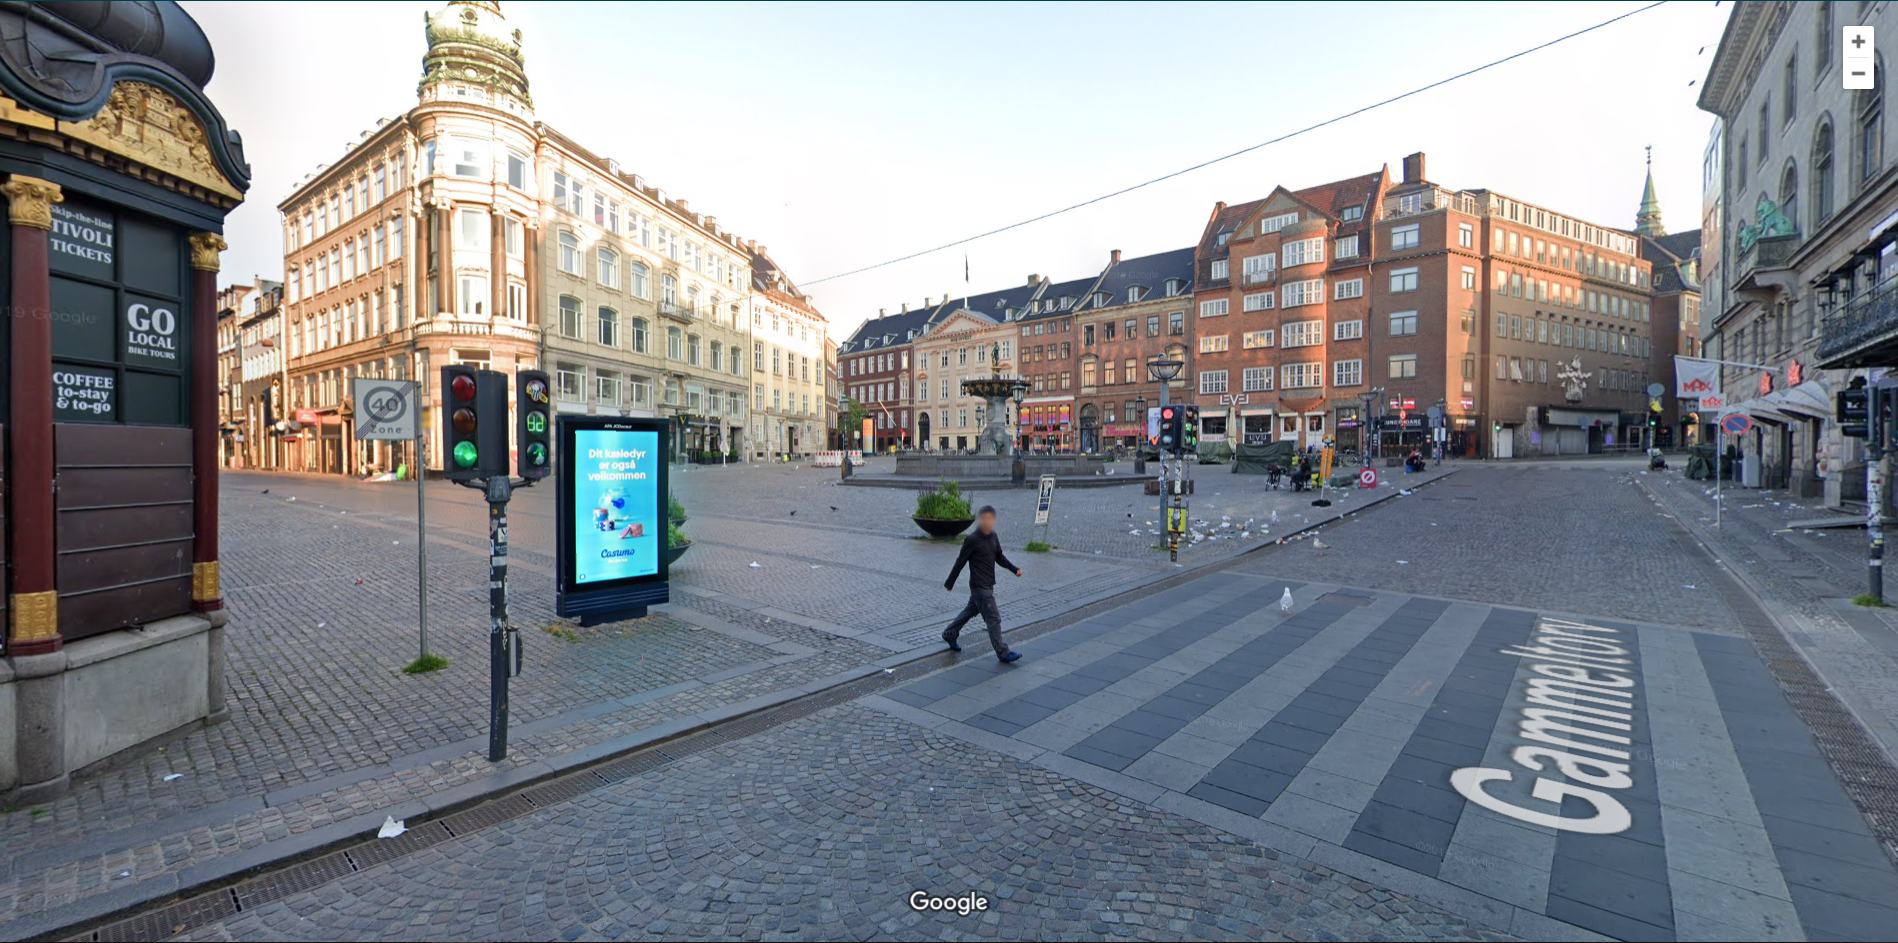
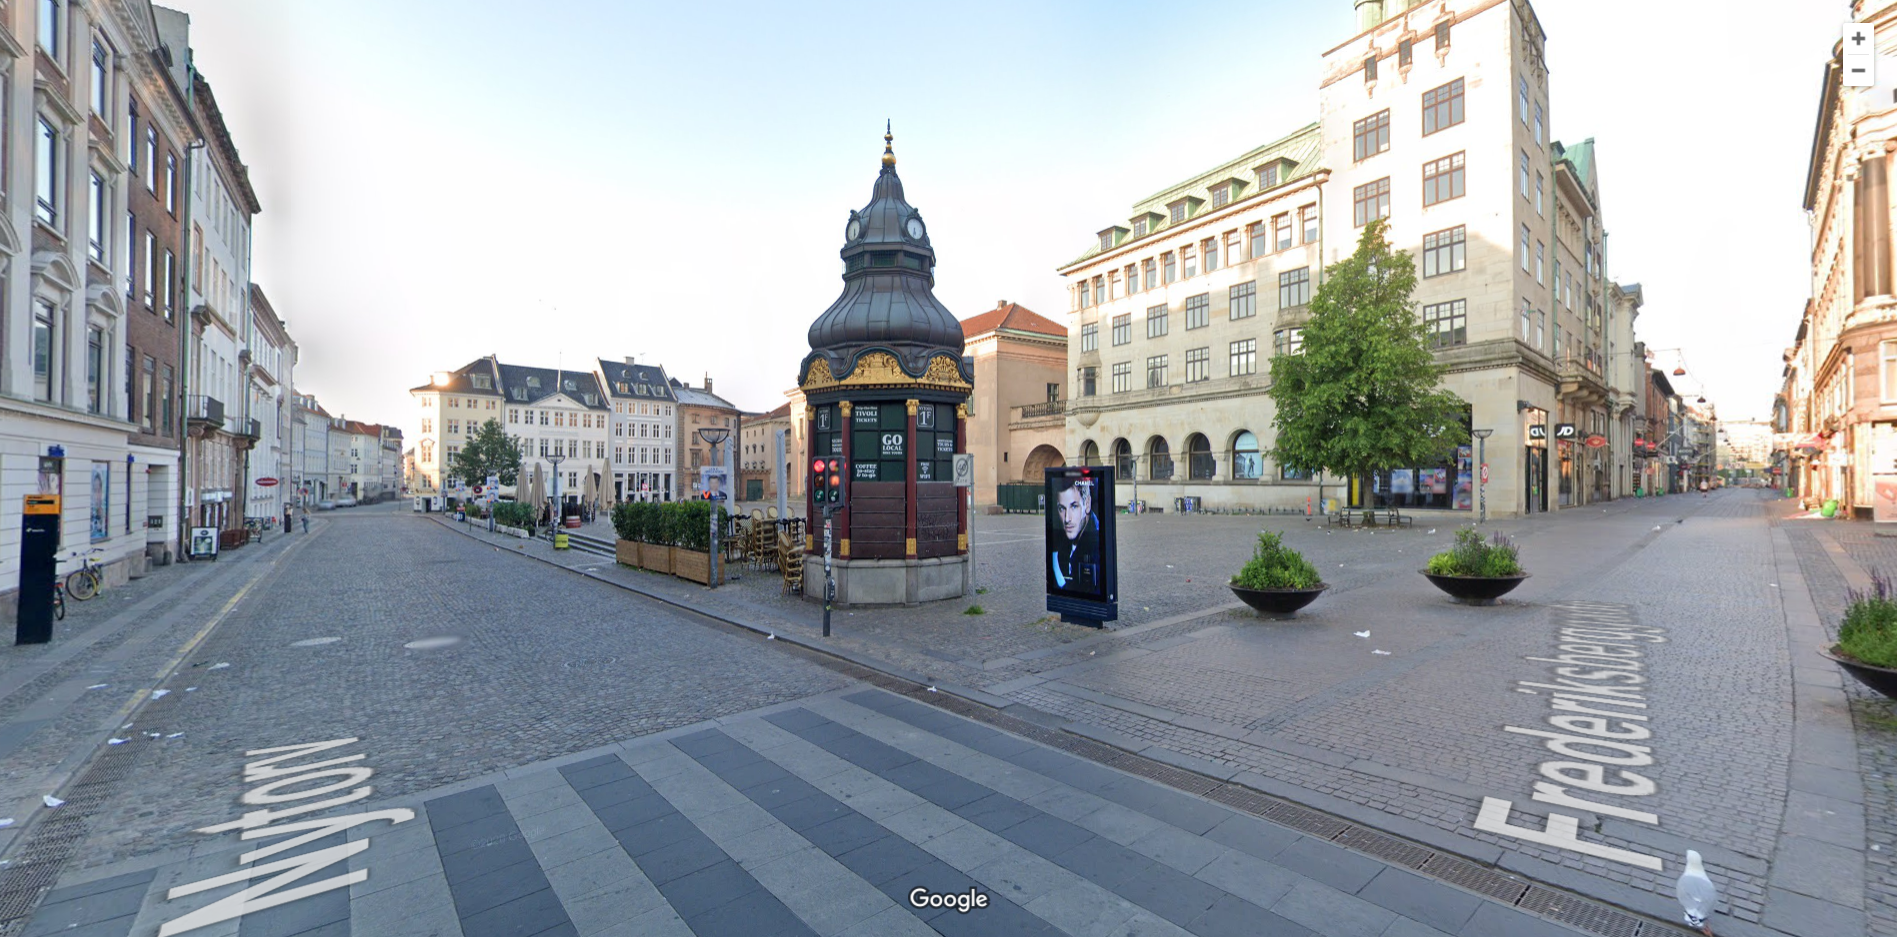
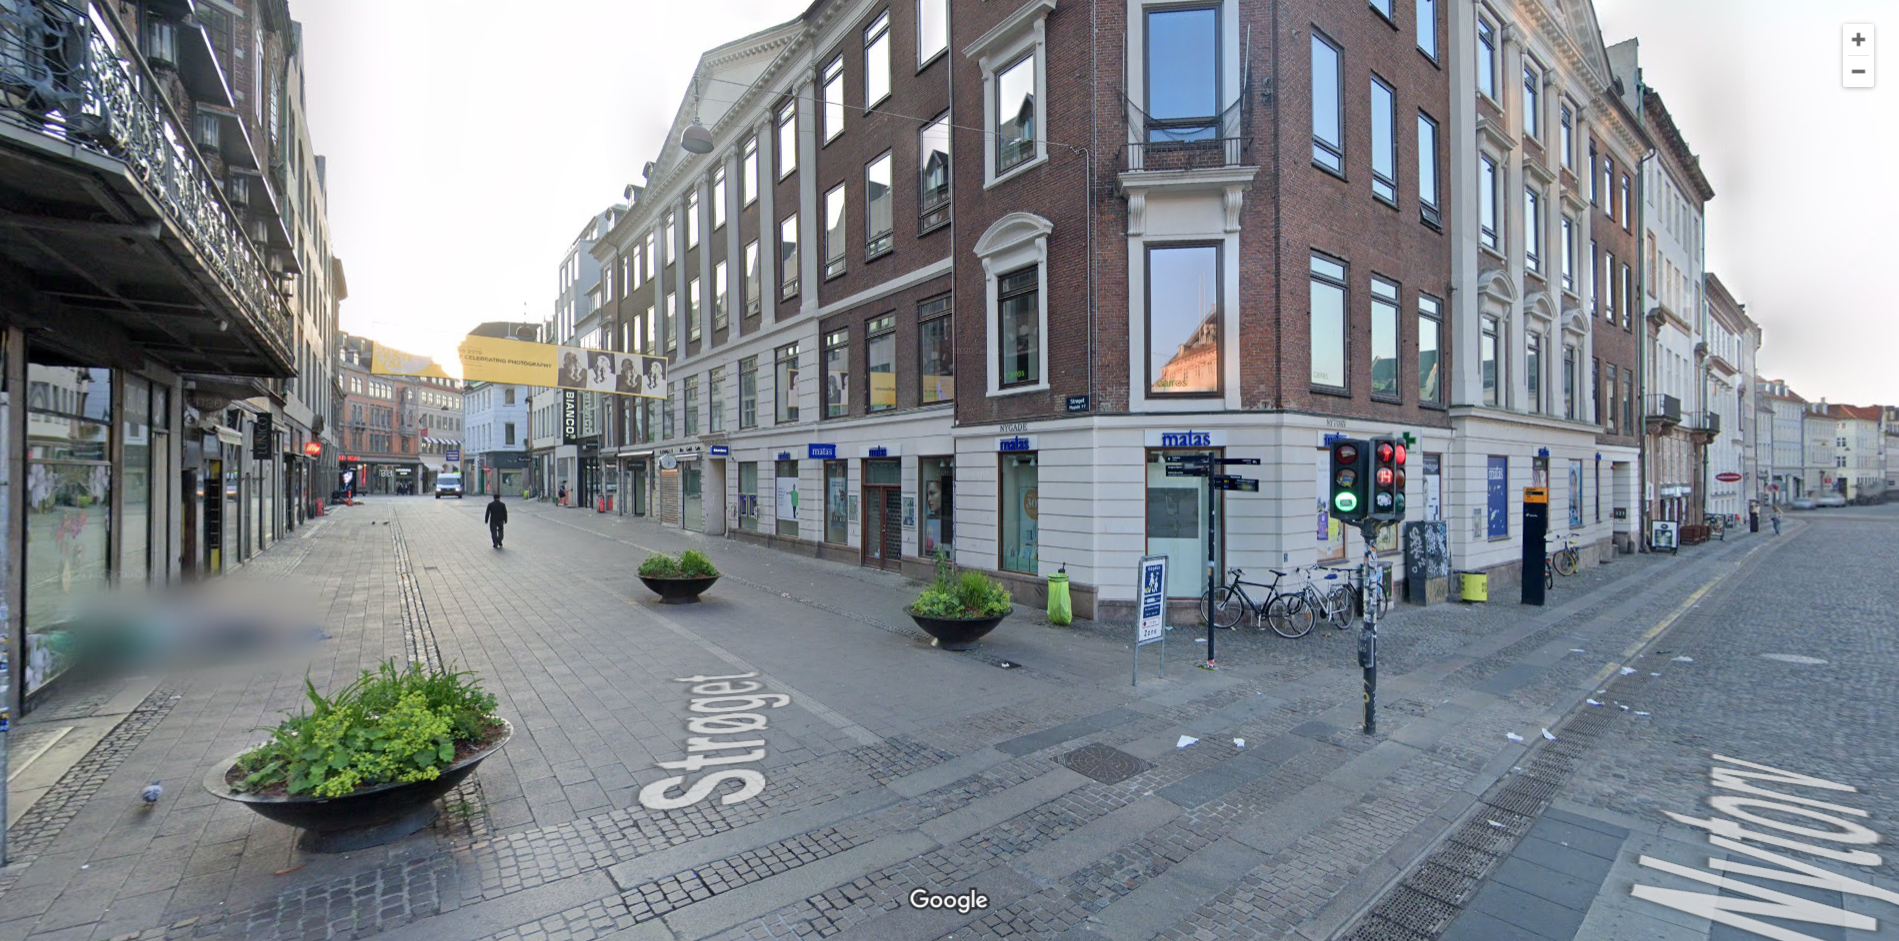
Screen surroundings
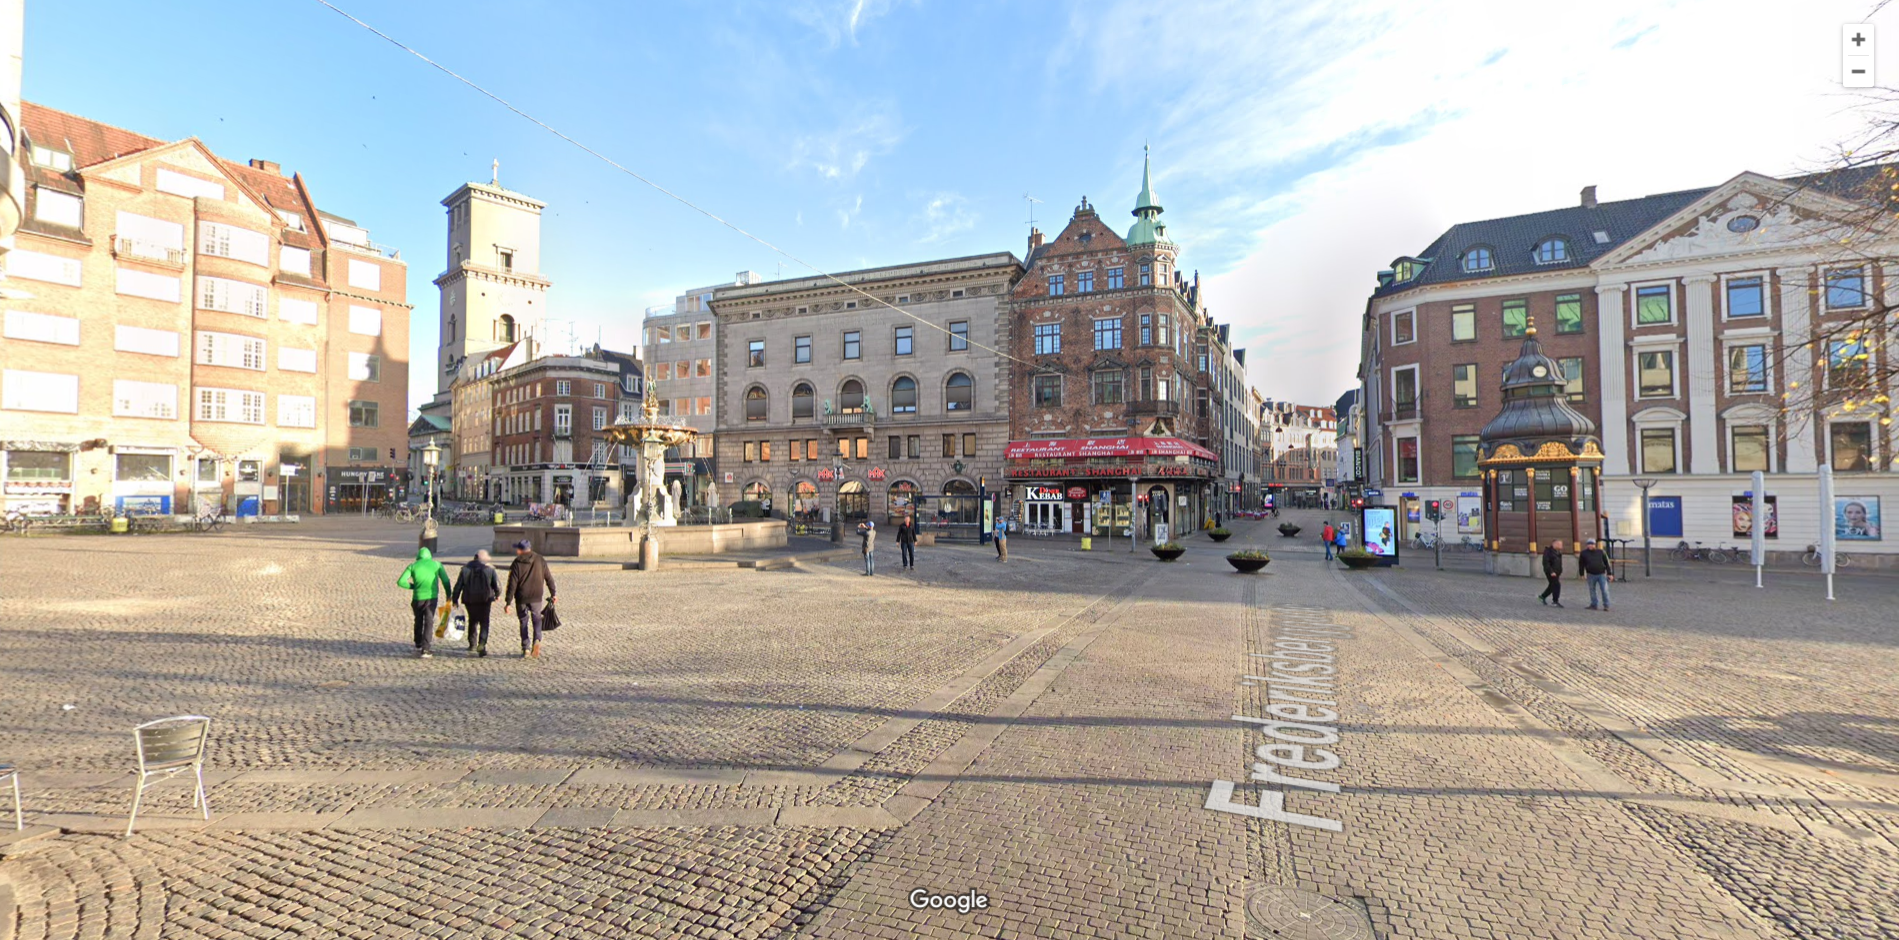
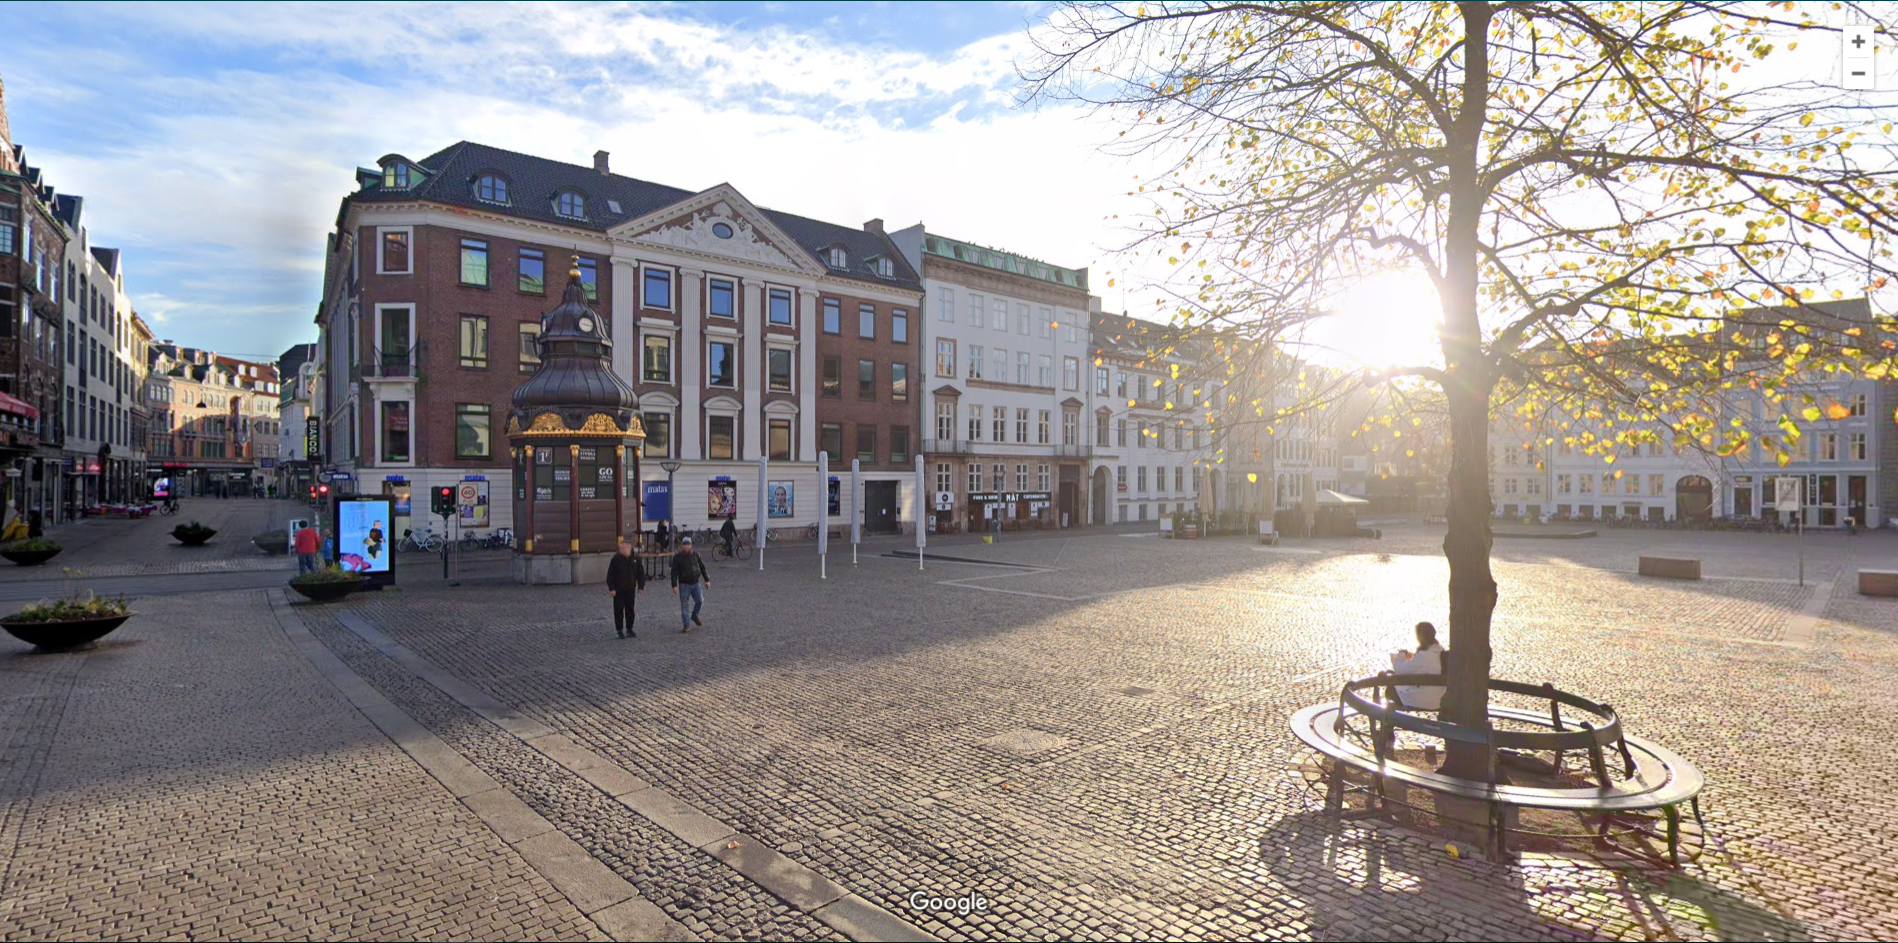
The goal is to capture all possible transport and pedestrian traffic pathways in 50-meter vicinity around the screen.
Parking lots, shopping malls, bus and tram stops are also major points of interest if they are within 50 meters vicinity from the screen.
The screen is in open space
If the screen is placed in open space (like city plaza, metro/bus stop, the passage in a shopping mall, etc.) and not obstructed by walls from either side, take a series of photo capturing its surroundings from 360 degrees.
The screen is mounted or built into the wall
Take a photo of the screen and nearby pathways from different angles up to 30 meters away from the screen.
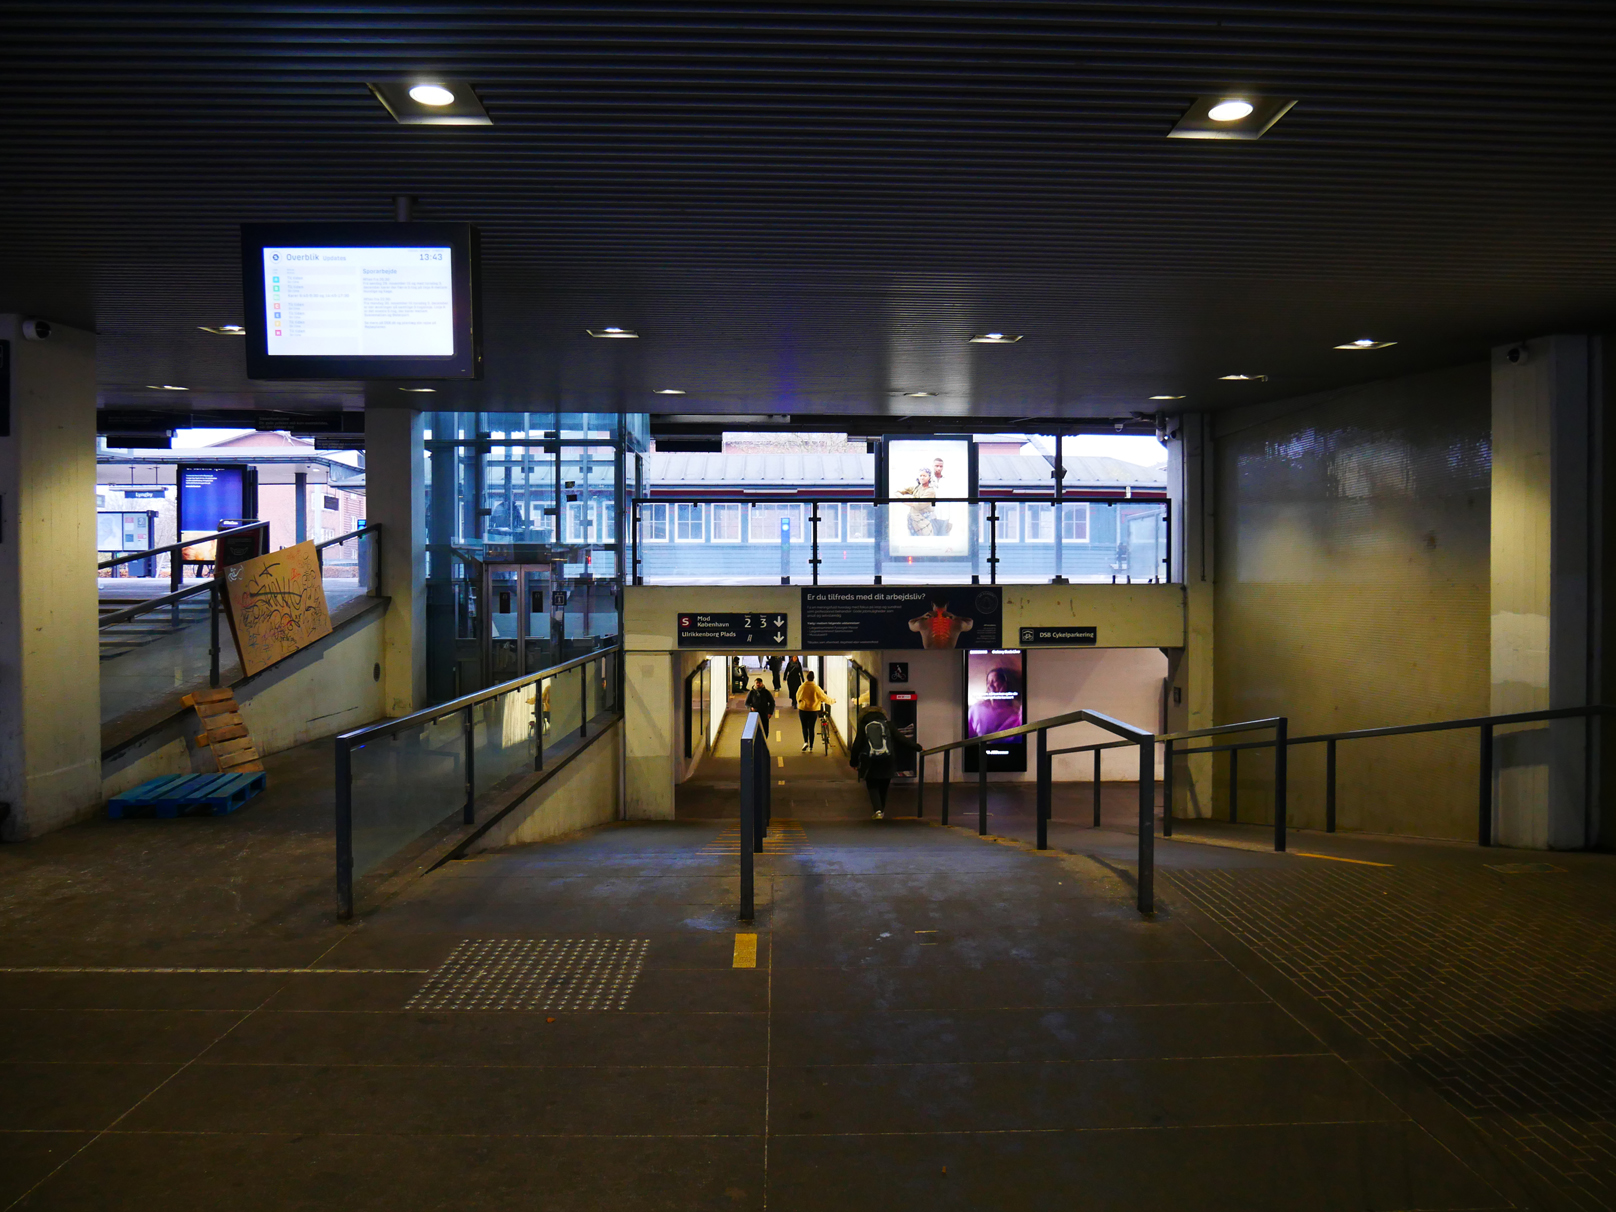
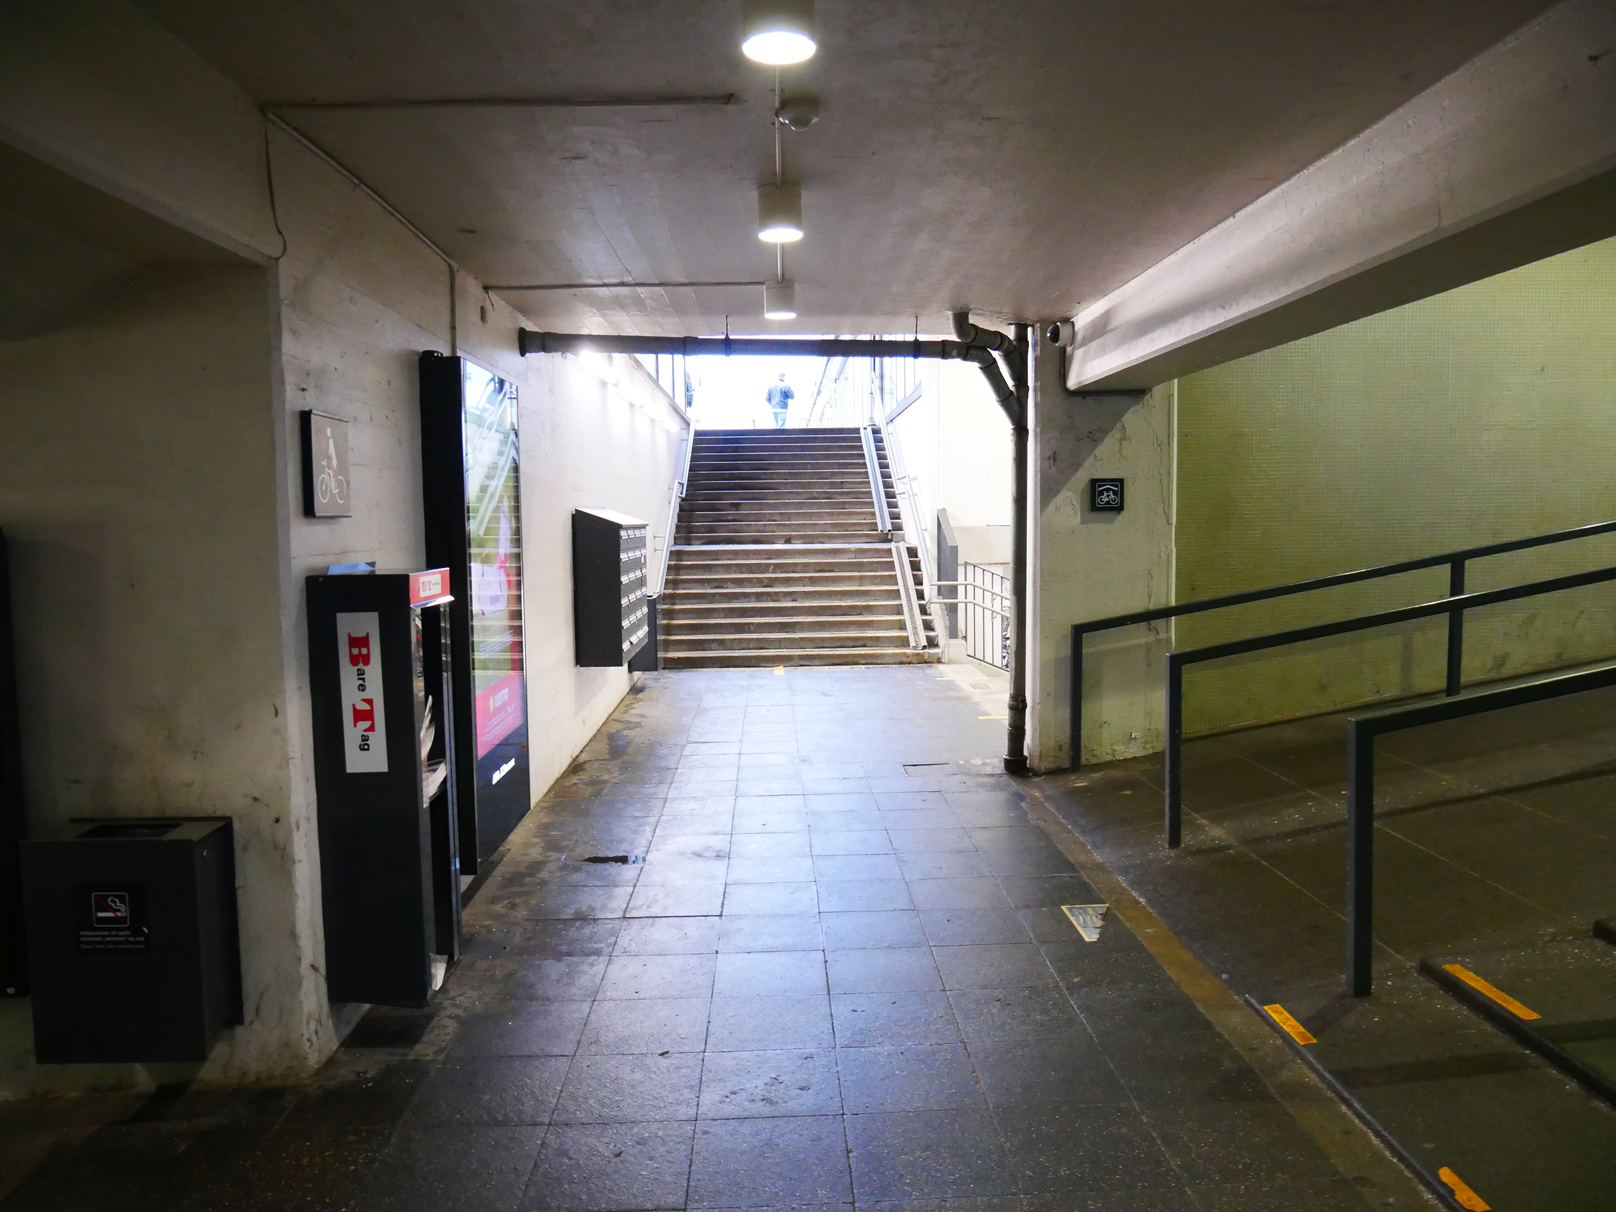
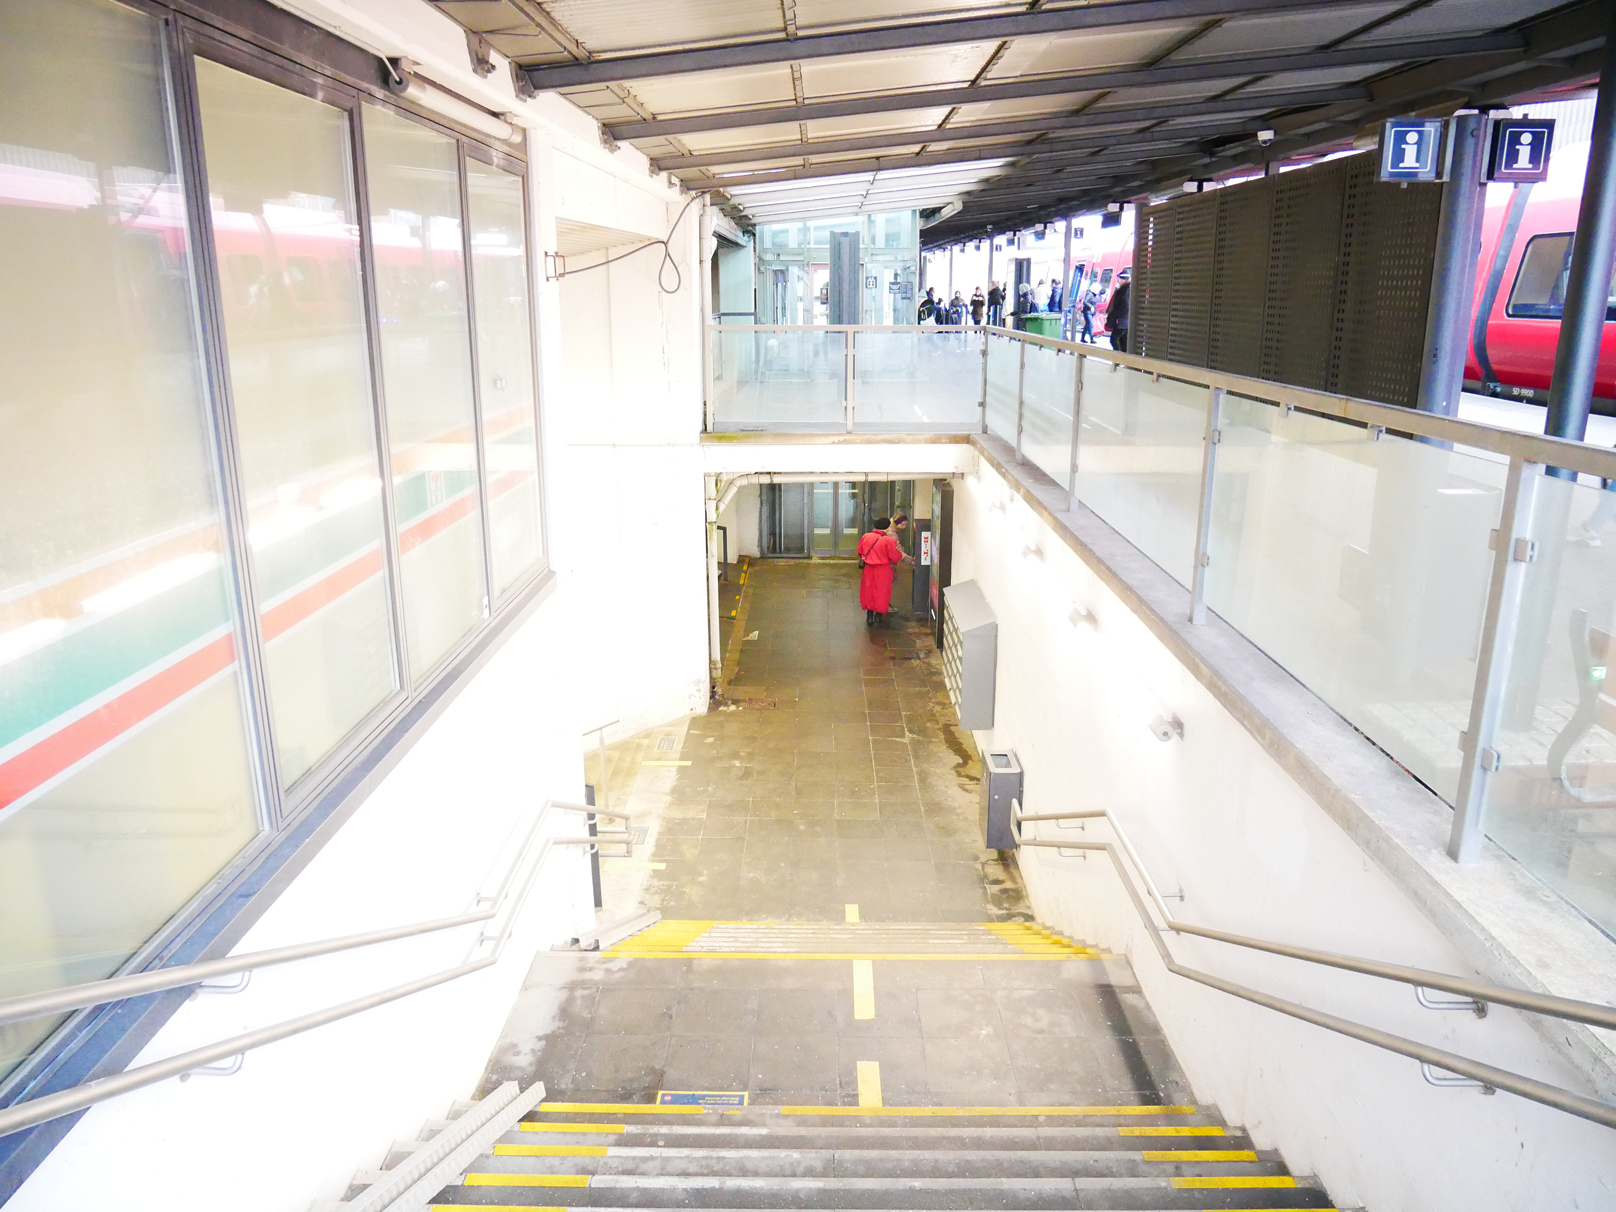
Capture the screen and any distinguishable landmark that could help further identify its positioning on the map, drawing or floorplan.
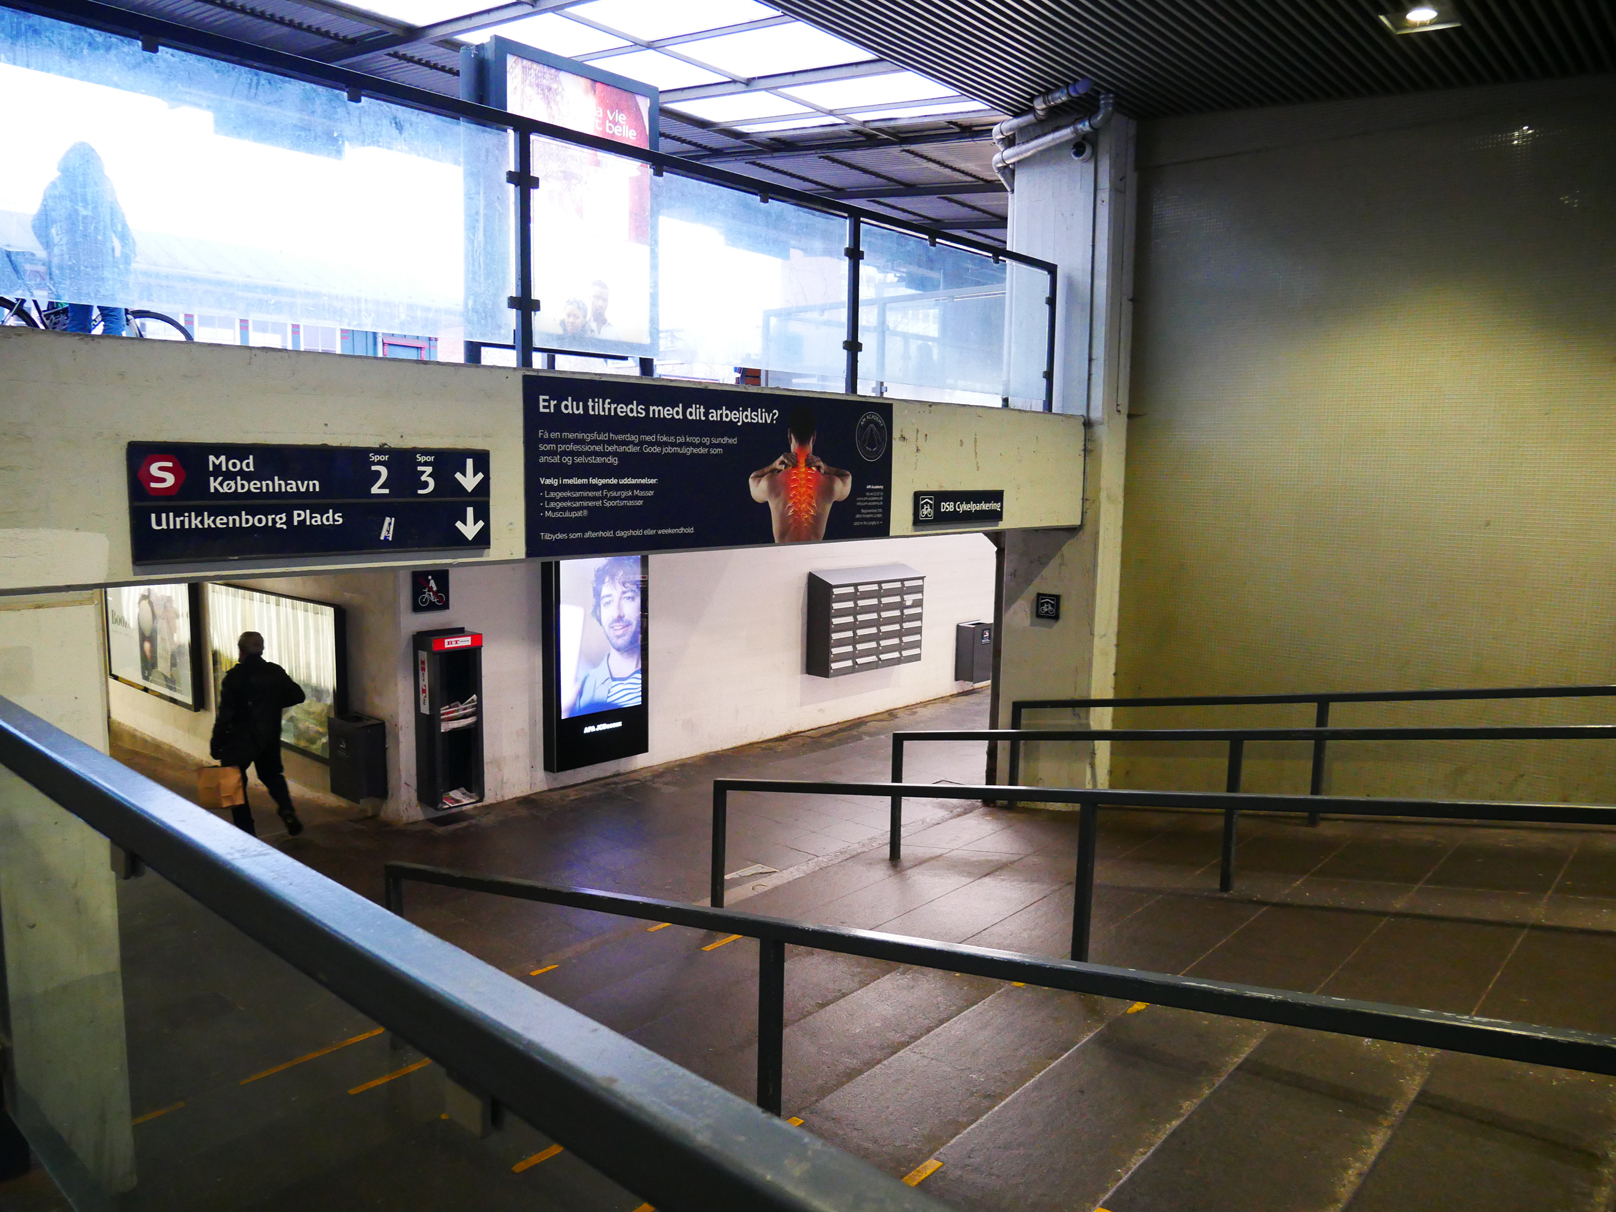
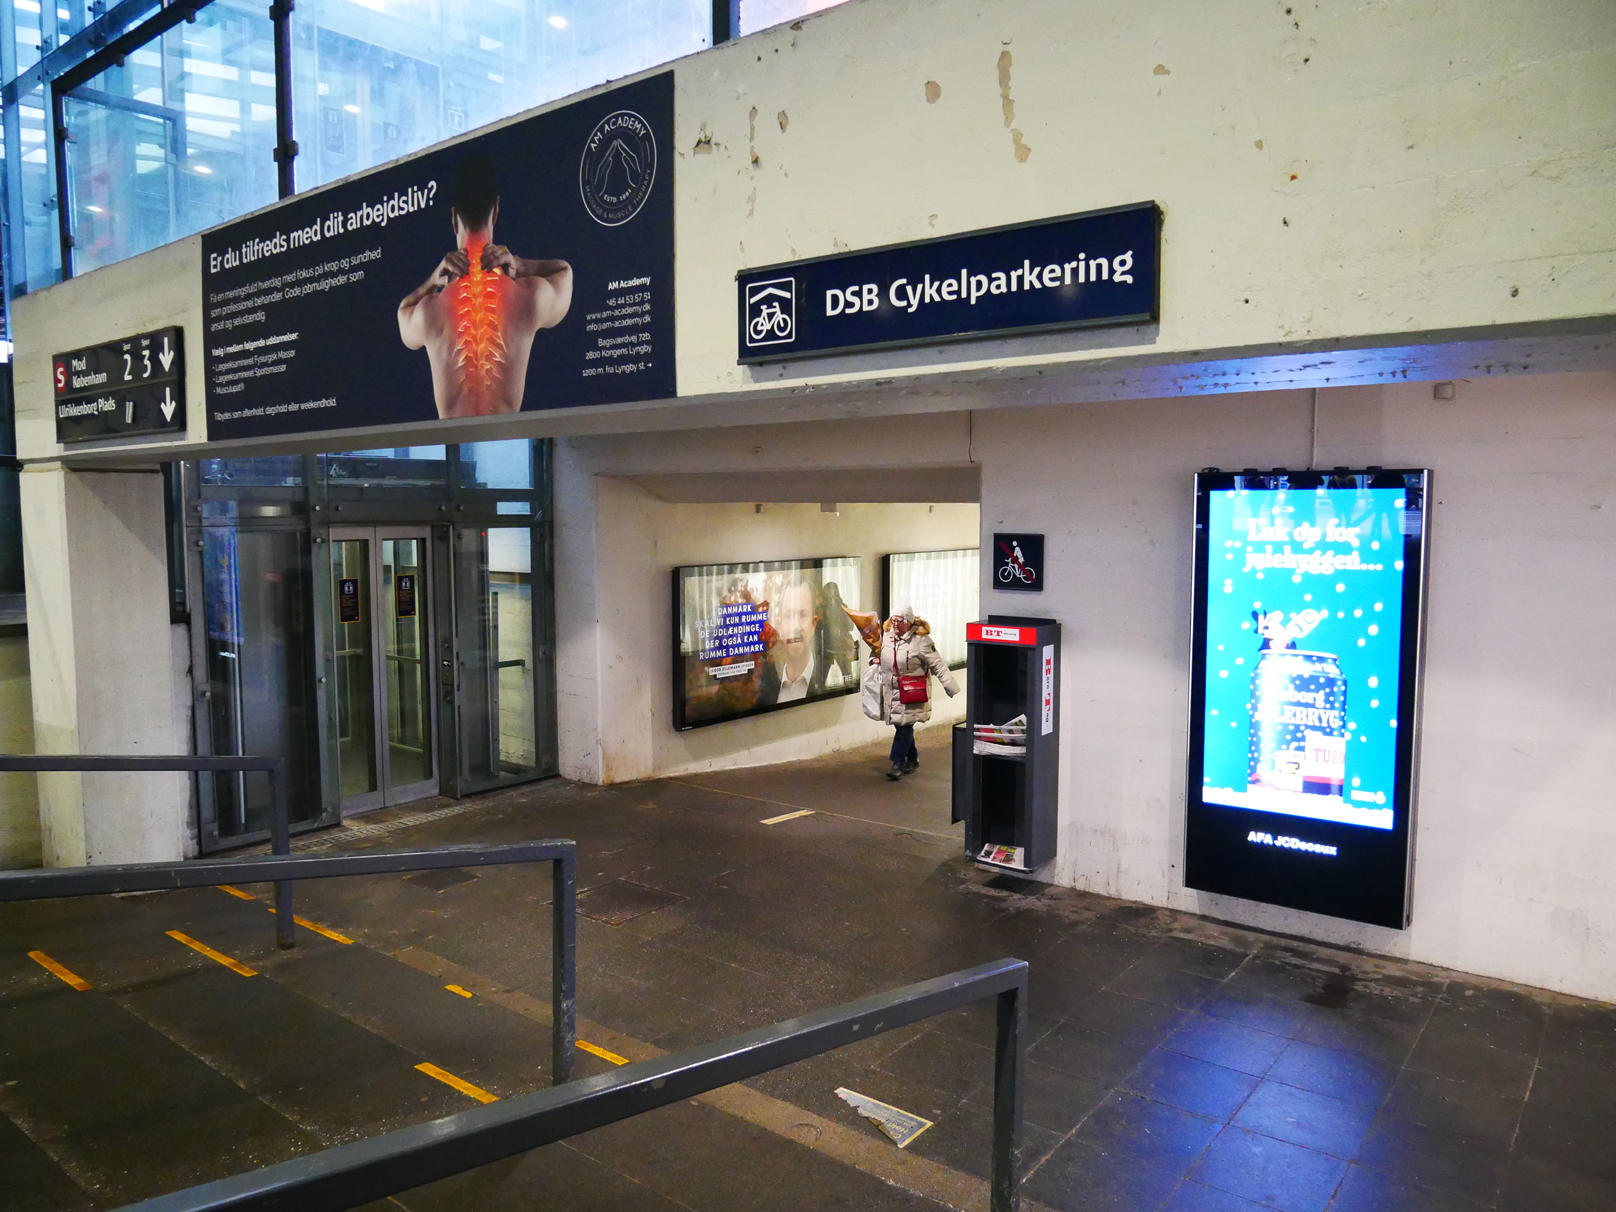
In a situation when it is impossible to capture screen and points of interest in a single shot, stay in close proximity to the screen and take pictures of its surroundings.
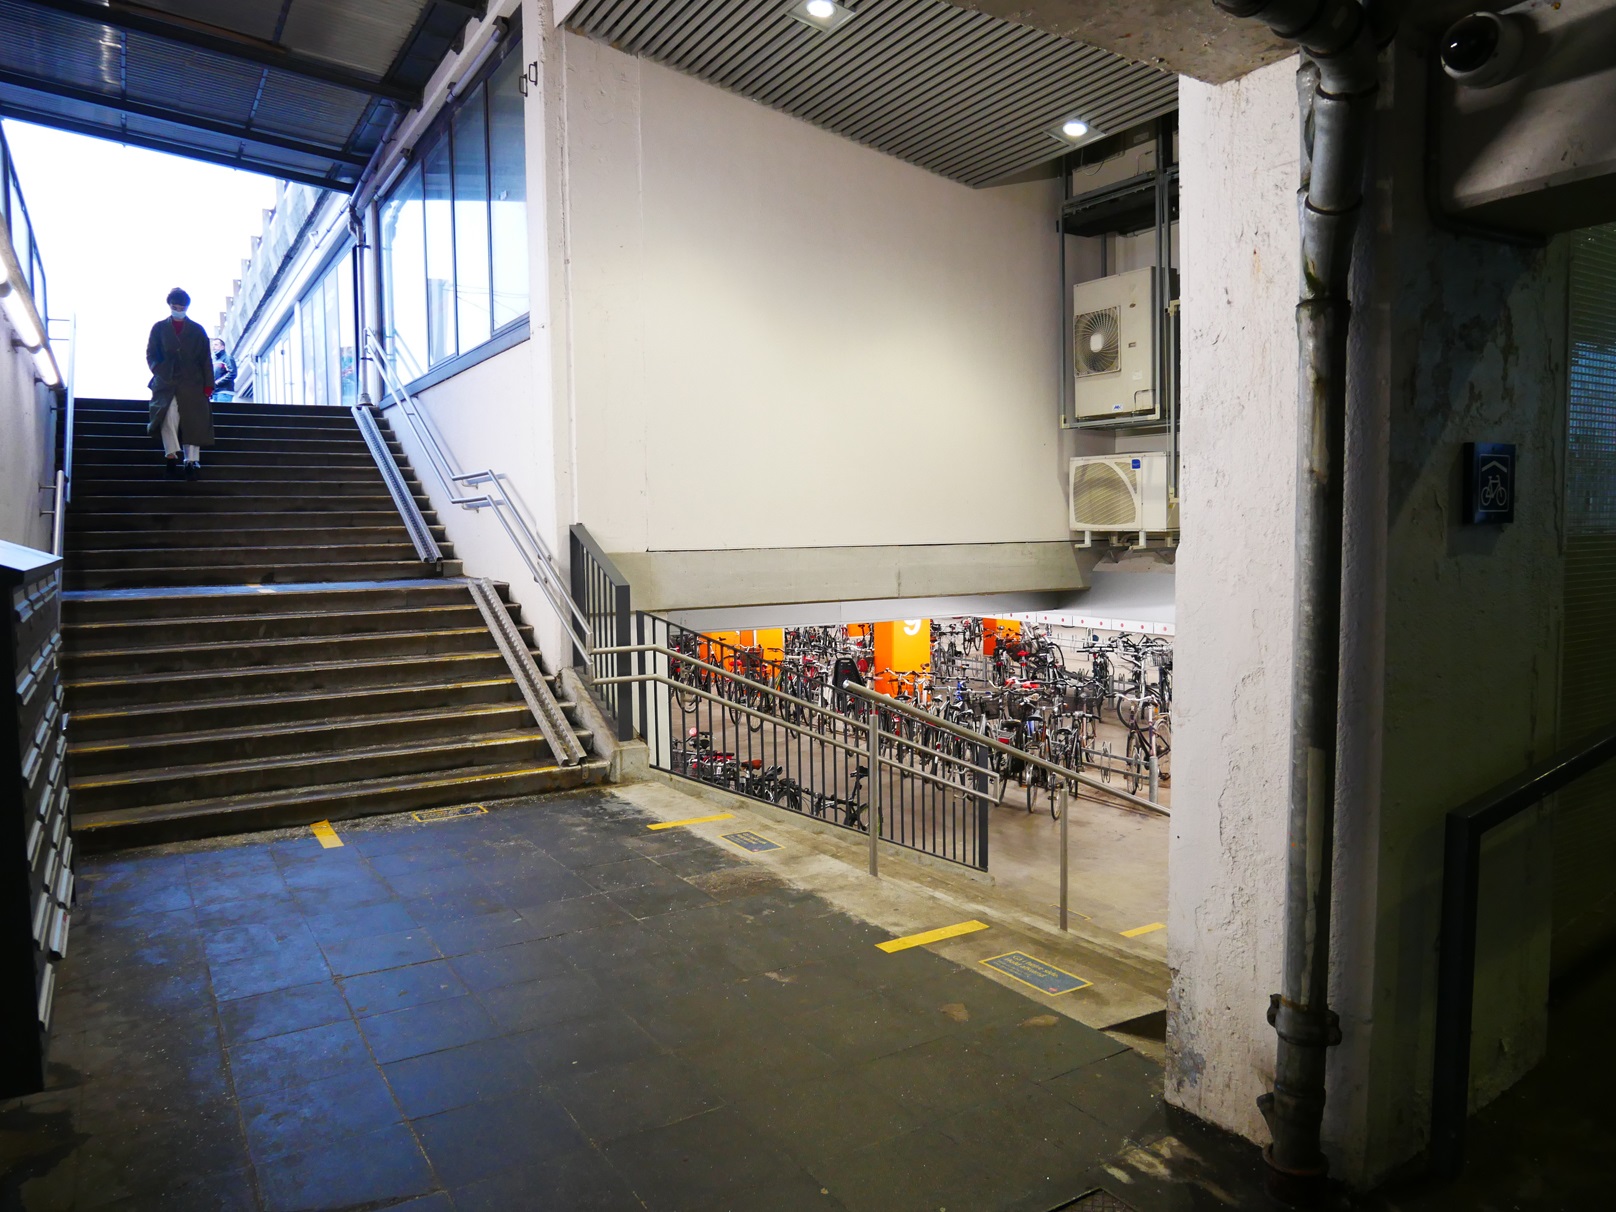

Photo upload
Using a web form
Open a web browser and go to https://allunite.zendesk.com/
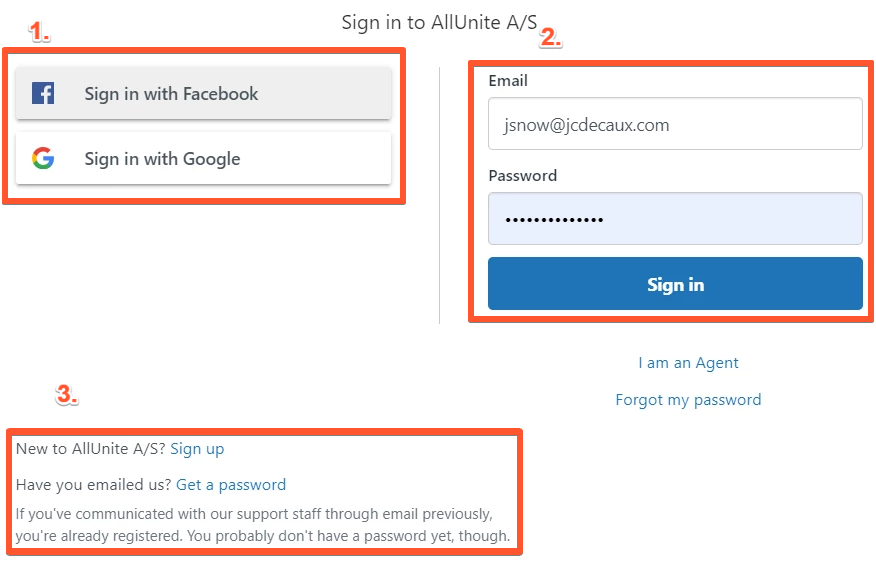
Navigate to the top right corner of the page and click “Sign in”

In a popup menu chose either option:
1. Login through social network
2. Login with email/password
3. Create AllUnite user profile
To use an existing Zendesk profile created not with AllUnite A/S, contact a Zendesk administrator of organization your profile belongs to and request to enable multiorganization support of your profile.
User profile creation
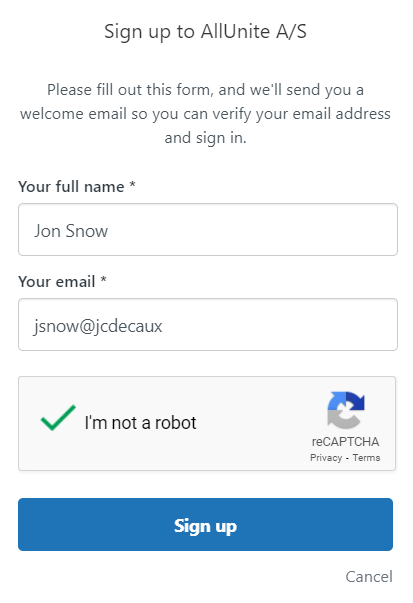
To create an account at AllUnite organization, click “Sign up” and fill the necessary fields in a popup window. Be sure to pass captcha as well.
Click “Sign up“ and check your inbox for a welcome email from jcd-support@allunite.com
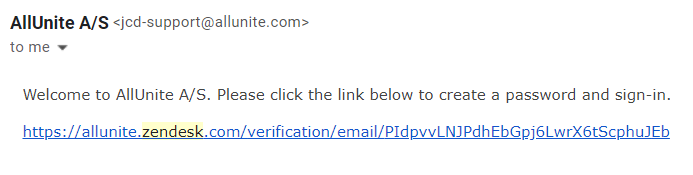
Follow the link and in newly opened tab confirm the name and choose the password.
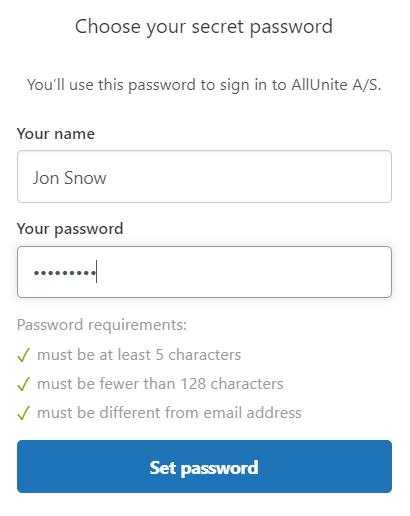
Submit and proceed to log in into your newly created account as it was described a few steps prior (Option 2. Login with email/password).
Photo submit
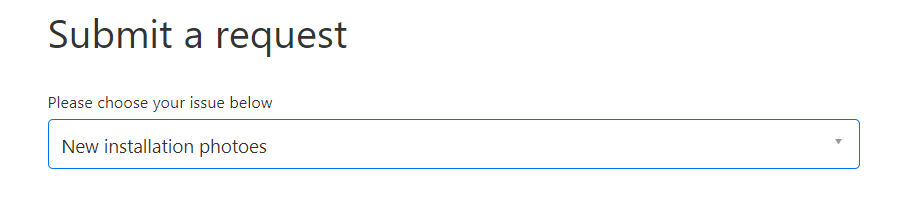
When logged in, in the top right corner of the page click the “Submit a request“ link.

“Submit a request” link is also accessible to anonymous users, but upload is limited to 5 files contrarily to the unlimited file count available for a logged-in user. We assume that in most cases there will be more than 5 files to upload and advise to create/login into account before starting the upload process.
In a dropdown menu chose “New installations photoes“ option.
From now and on every field below is necessary to fill.
Enter the country the screen is installed in

Unique Screen ID that is used for cross-system recognition

Serial number and MAC address of AllUnite sensor (can be found on the label on a sensor backside)

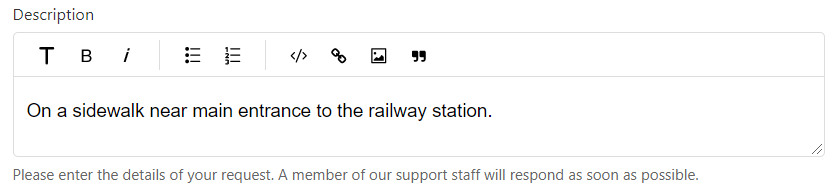
Briefly describe screen positioning against its surroundings, e.g. on a corner of Broadway and Lexington streets, it's the only screen there; entering the south doors it would be the first/second/third screen in the row; along the passageway (or down/up stairs, escalator, etc.) on the right/left wall heading to/from the metro station and so on.
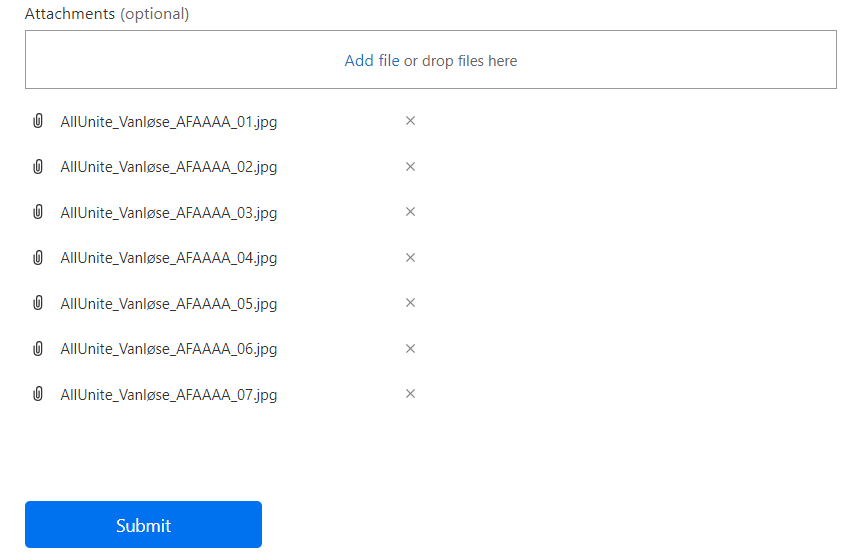
Drag and drop or upload files using a form and click submit
In email attachment
Attach files to mail body and send them to jcd-support@allunite.com
Name your email in the subject field according to the pattern: Screen ID - installation photos.
Be sure to write to us:
A country where the installation was done
Screen ID (yes, duplicate it in mail body)
AllUnite sensor SERIAL and MAC in format: 1101419211 00:1E:42:19:39:C7
Describe screen positioning against its surroundings